
For as long as I’ve been doing this blog, I’ve been getting the question, “How can I make ribs on a gas grill?” Plenty of people are under the impression that you need a charcoal grill or smoker to make great barbecue ribs. That’s simply not the case.
I love cooking with charcoal, adding wood, creating smoke and tending a fire. But I also realize plenty of people don’t own a charcoal grill, and you shouldn’t need to buy one just to make a great rack of ribs.
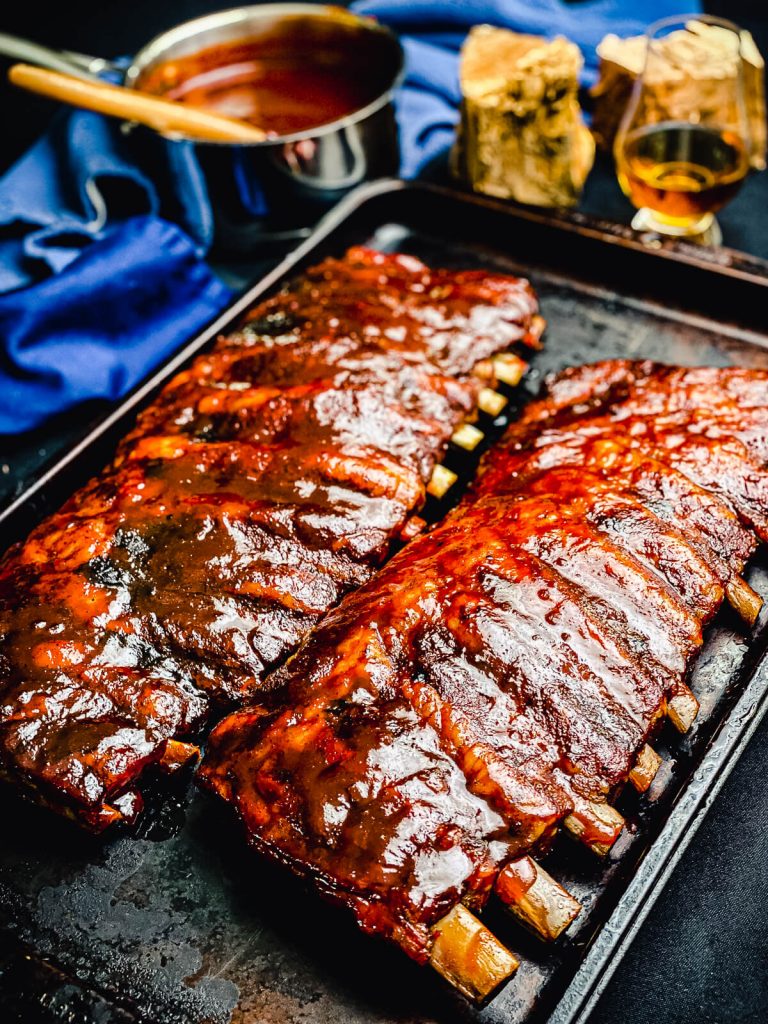
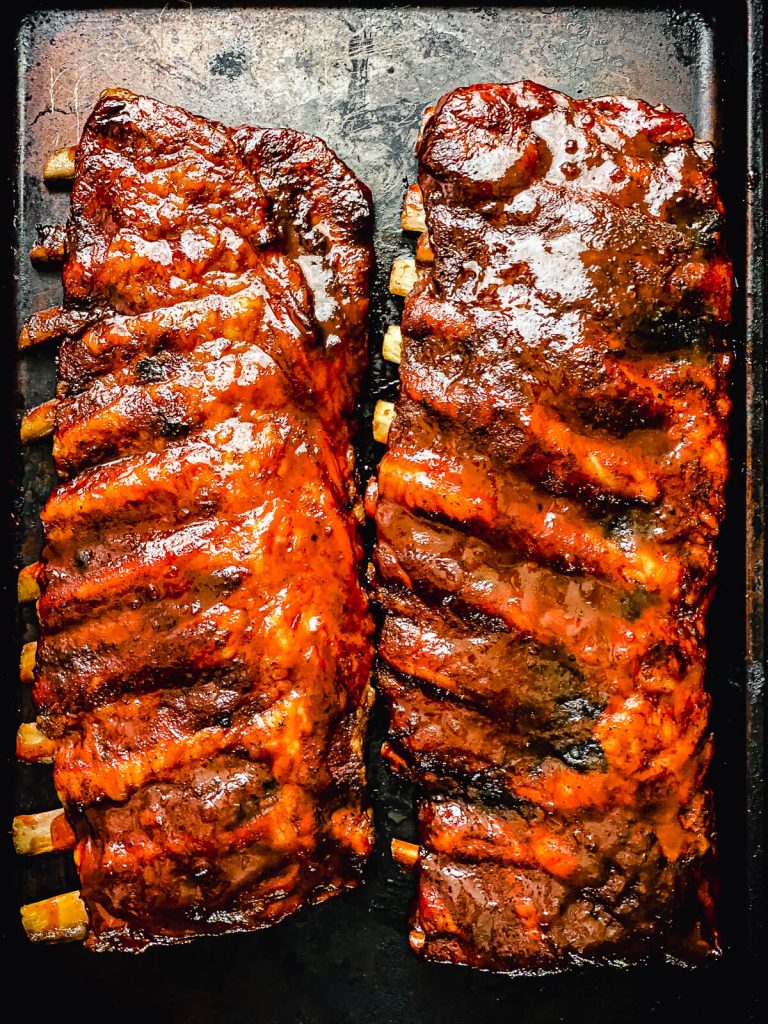
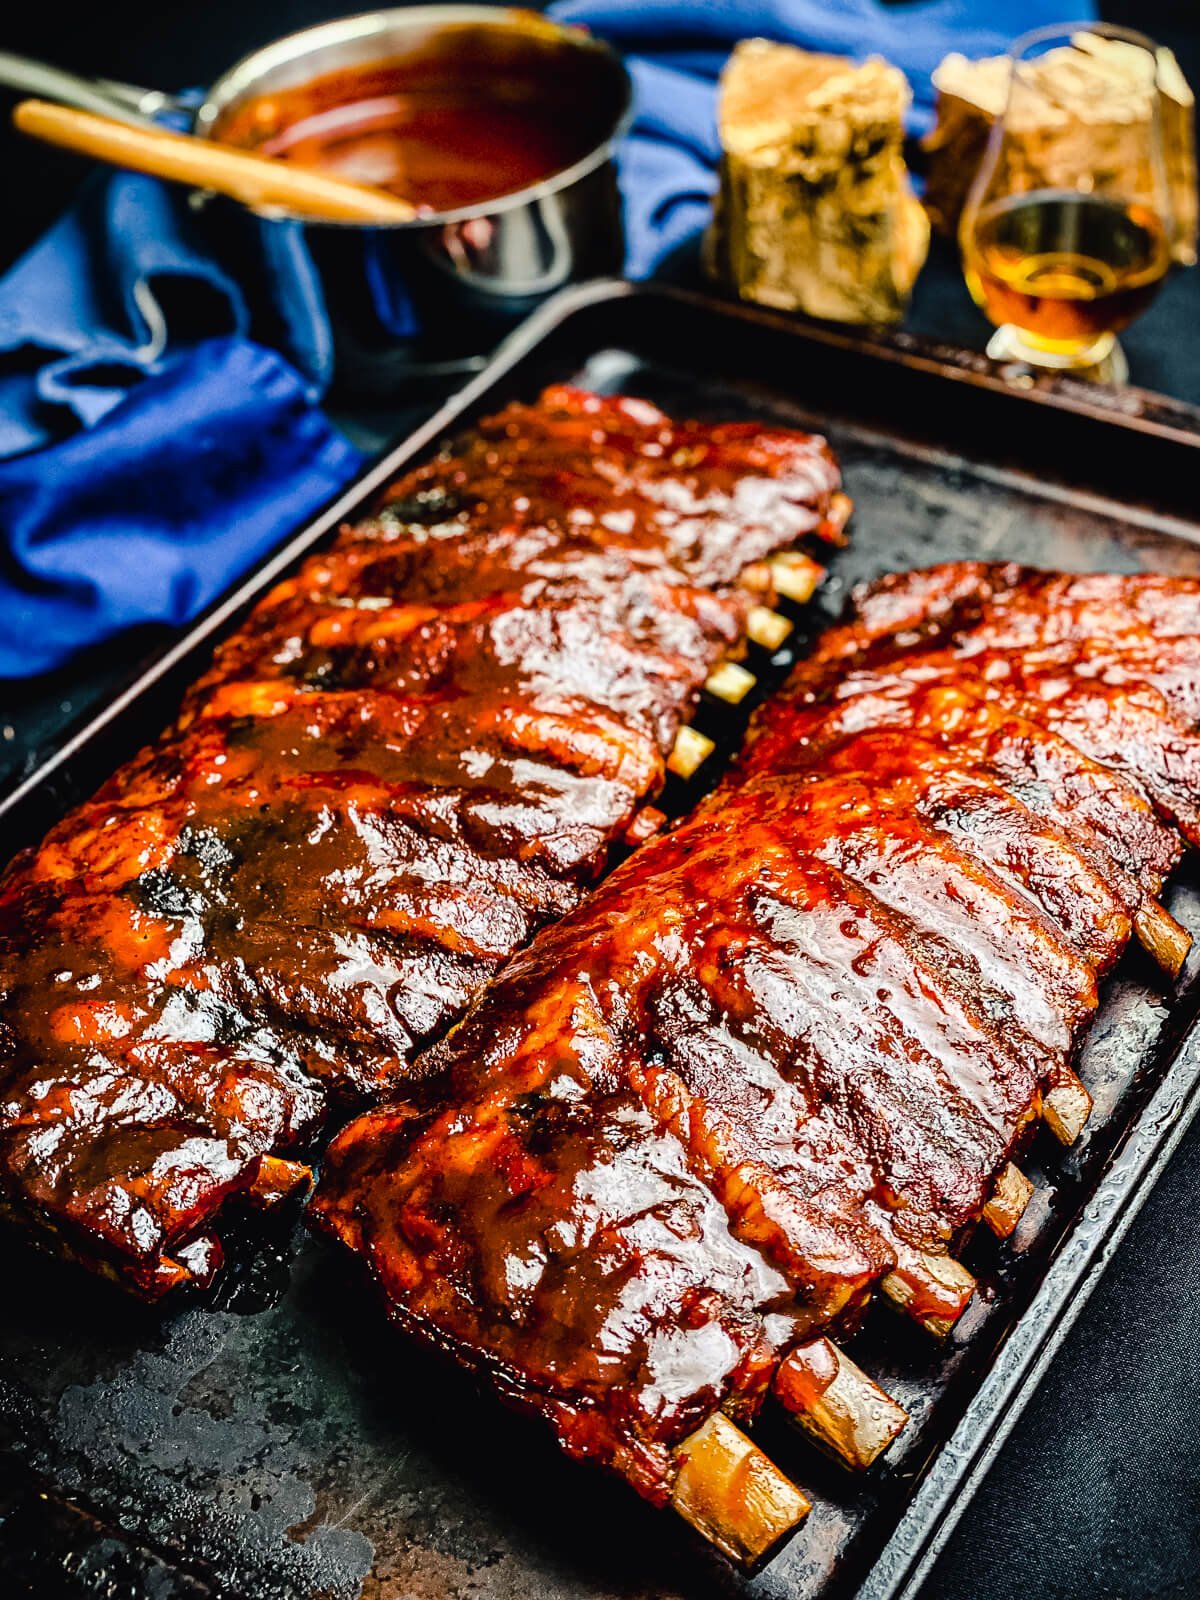
The trick is learning how to use your gas grill differently. By setting it up for two-zone cooking and adding a little wood smoke, you can essentially turn it into an outdoor oven with smoke. The ribs cook low and slow over indirect heat, get wrapped once the color is right, then finish with sauce until they’re tender, smoky and tacky.
The process is simple: Smoke. Wrap. Sauce.
<div>
Gas Grill Ribs at a Glance
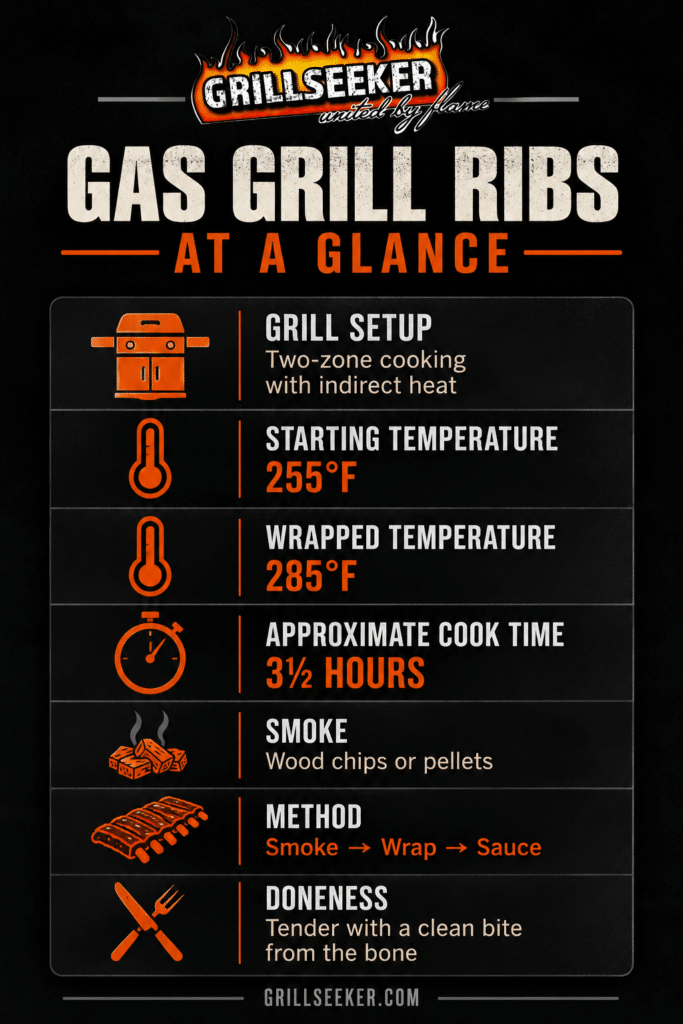
Cook time will vary depending on the size and thickness of the ribs and how well your grill maintains temperature. Use the clock as a guide, but let the color and tenderness of the ribs tell you when they’re ready.
</div>
Why This Technique Works
The key to making ribs on a gas grill is treating the grill more like an outdoor oven than a traditional grill. One burner provides the heat while the ribs sit on the opposite side where there’s no direct flame.
Adding wood chips or pellets over the active burner brings smoke into the equation. With the lid closed, the ribs cook slowly in that indirect heat while taking on smoke flavor.
Wrapping the ribs later in the cook helps tenderize them without letting the outside get too dark. Once they’re nearly done, the wrap comes off and the sauce goes on for the final few minutes.
How To Set Up a Gas Grill for Ribs
To barbecue ribs on a gas grill, you need at least two burners so you can create two separate cooking zones. Three or more burners make this even easier.
Light one burner and leave the burner or burners directly beneath the ribs turned off. By doing this, you’re essentially turning your gas grill into an outdoor oven, with the added element of smoke.
Place the ribs over the inactive burner so they cook with indirect heat. Put your wood chips or pellets over the active burner so the heat produces smoke.
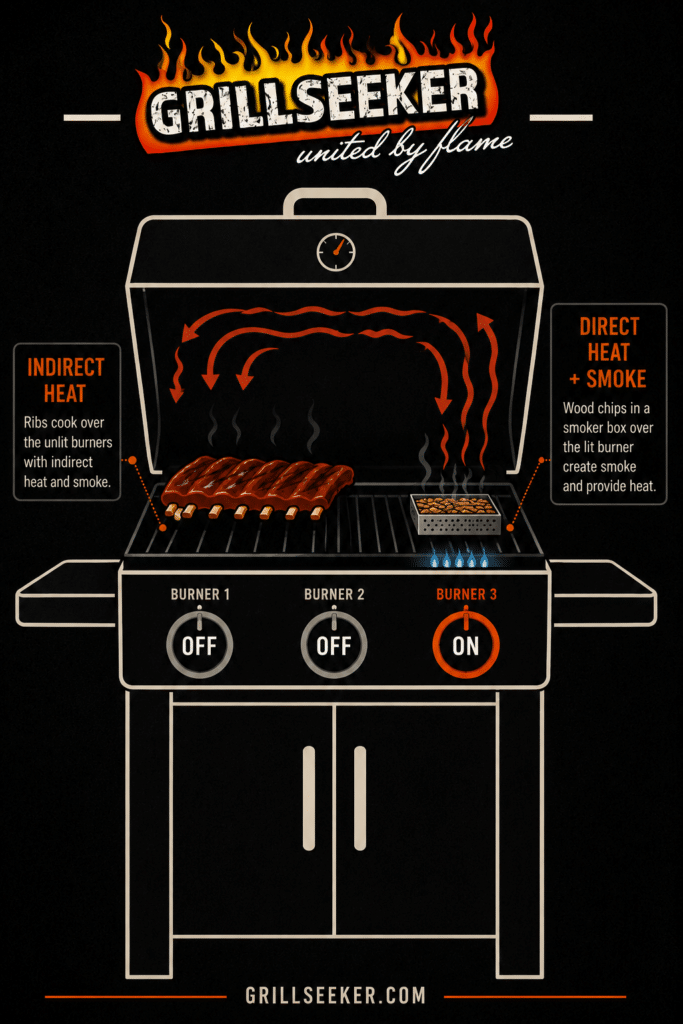
Because there’s no direct heat under the ribs and the temperature is being kept low, the ribs can come up to temperature slowly, rendering fat and breaking down connective tissue along the way without burning.
Close the lid and let the temperature at the cooking grate stabilize at 255°F. Once the wood starts smoking and the temperature is steady, you’re ready for the ribs.
If you’re new to this style of grilling, my guide to two-zone cooking takes a deeper look at how and why this setup works.
How To Add Smoke to a Gas Grill
You don’t need a built-in smoker box to add smoke flavor to ribs on a gas grill. Wood chips or pellets work great in a smoke box, smoking tube, or even a homemade aluminum foil packet like the one below.
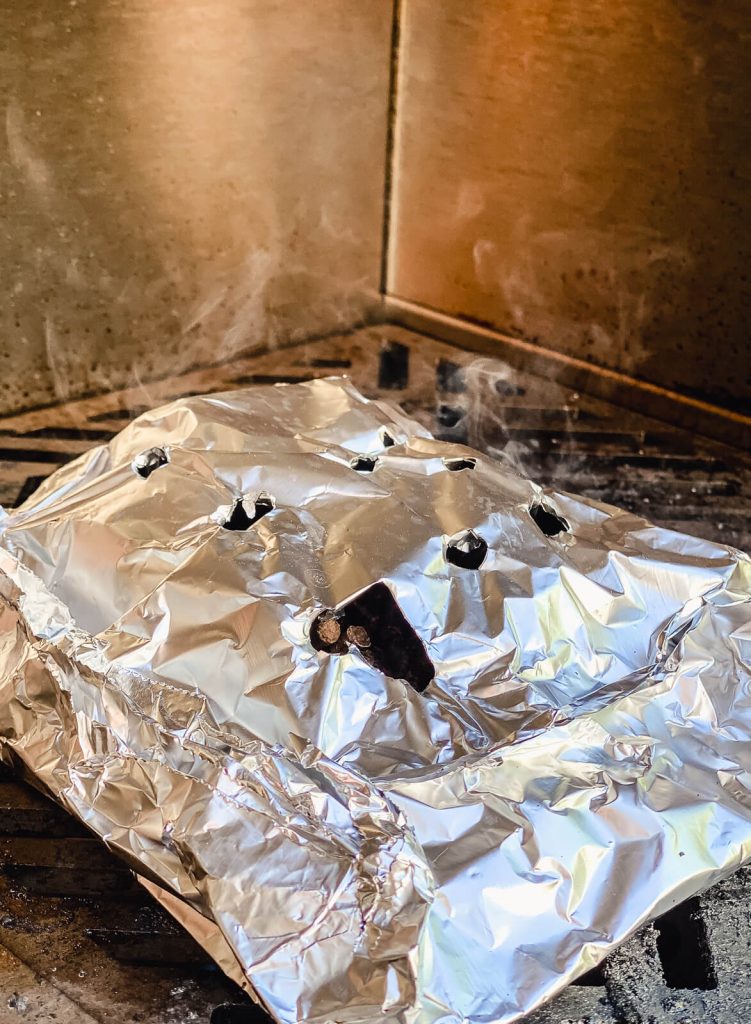
Whichever method you use, place the wood chips or pellets over the active burner. The heat from that burner gets them smoking while the ribs stay safely on the indirect side of the grill.
And let’s dispel one myth while we’re here: don’t soak wood chips in water. Water doesn’t make them smoke longer. They just steam until the water evaporates before they can actually start smoking. Wood chips are cheap; let them smoke and add more if you need them.
Finally, don’t assume more smoke is better. You don’t want thick white smoke rolling out of the grill like something’s on fire. Good smoke is light, clean and sometimes almost hard to see. That’s the smoke you’re looking for.
How Long Does It Take To Grill Ribs on a Gas Grill?
Plan on about 3½ hours to cook ribs on a gas grill using this method. That’s about the same amount of time they’d take on a charcoal or pellet grill.
That 3½ hours isn’t absolute. The type and thickness of the ribs, how many racks you’re cooking, and your grill’s ability to maintain a steady temperature can all affect the cooking time.
More importantly, don’t cook ribs strictly by the clock. Use time as a guide, but let the color and tenderness of the ribs tell you when they’re ready.
What Temperature Do You Cook Ribs on a Gas Grill?
You’ll actually cook the ribs at two different grill temperatures.
Start at 255°F while the ribs are unwrapped. This lower temperature gives the ribs time to take on smoke and develop that deep mahogany color, but there’s another important reason for cooking them low and slow: tender meat is a function of both time and temperature.
You could cook ribs over high heat and get their internal temperature above 200°F much faster, but that doesn’t mean they’d be tender. Cooking them slowly gives the collagen and connective tissue time to break down as the internal temperature rises.
Once the color is right and the ribs are wrapped, increase the grill temperature to 285°F. At this point, we’re less concerned about adding smoke and more concerned about getting the ribs tender. The wrap and slightly higher temperature help speed that process along without letting the outside get too dark.
One important thing here: don’t blindly trust the thermometer built into your grill lid. Even if it’s accurate, (it’s likely not, but let’s assume it is) it’s measuring the temperature high in the lid, not down at the cooking grate where the ribs are sitting. That difference can easily be 50°F or more.
Use a reliable leave-in thermometer with the probe positioned near the ribs in the indirect cooking zone. That way, when I say 255°F or 285°F, you know you’re actually cooking the ribs at those temperatures and not whatever the lid thermometer happens to be telling you.
Should Ribs Be Wrapped in Foil When Grilling?
For this method, absolutely. Wrapping the ribs helps preserve that beautiful mahogany color, but more importantly, it helps break down the connective tissue and get the ribs tender.
You’ll often hear that ribs should be wrapped when they reach an internal temperature of around 160°F to 165°F. If that’s what you’re comfortable with, roll with it. I prefer to let the ribs tell me when they’re ready to be wrapped.
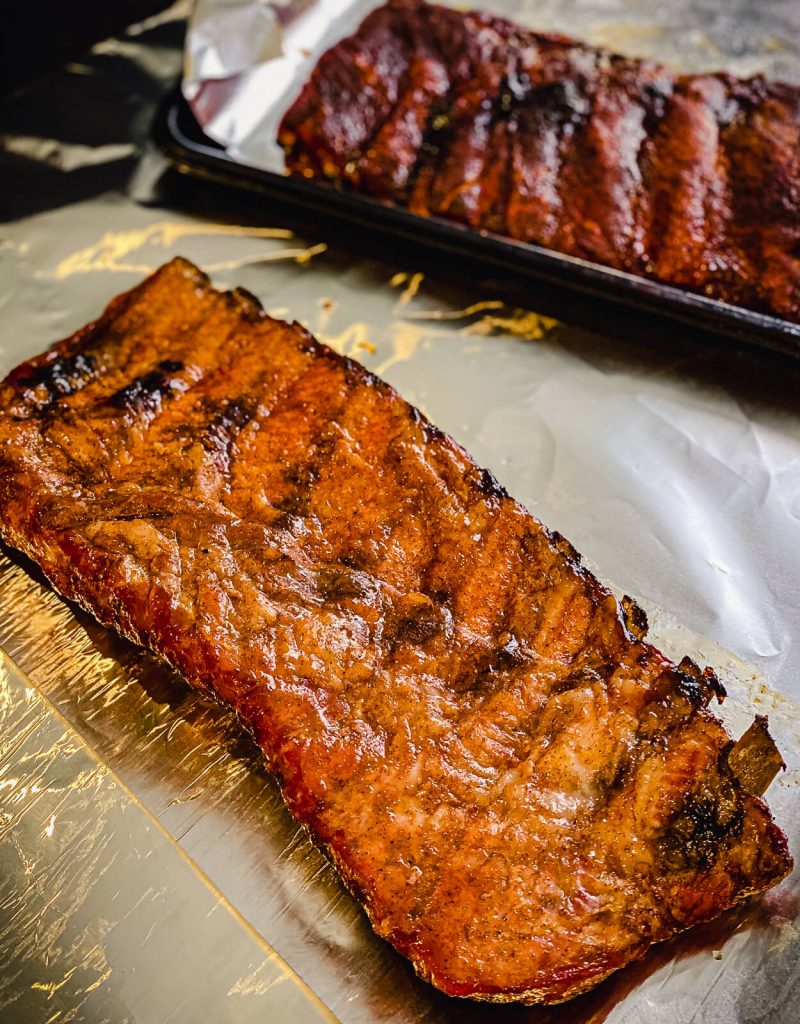
I’m looking mostly at color and bone pullback. When the ribs have developed a bright red to deep mahogany color and the bones are just starting to peek out, it’s time to wrap them. For me, that usually happens at around the two-hour mark.
Leaving them unwrapped a little longer won’t ruin the ribs, but eventually they’ll get darker than a bag of smashed assholes, and most people don’t find that particularly appetizing.
How To Tell When Ribs Are Done
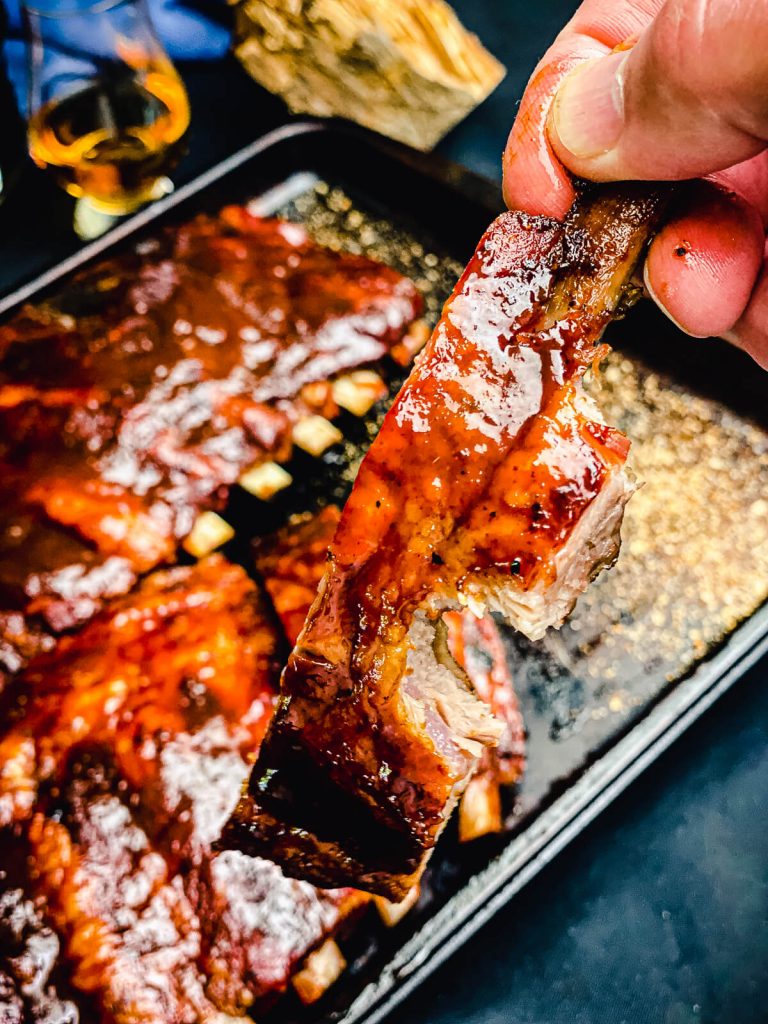
Ribs shouldn’t be cooked until the meat simply falls apart when you pick them up. You want ribs that are tender and juicy, but still have enough structure to give you a clean bite from the bone.
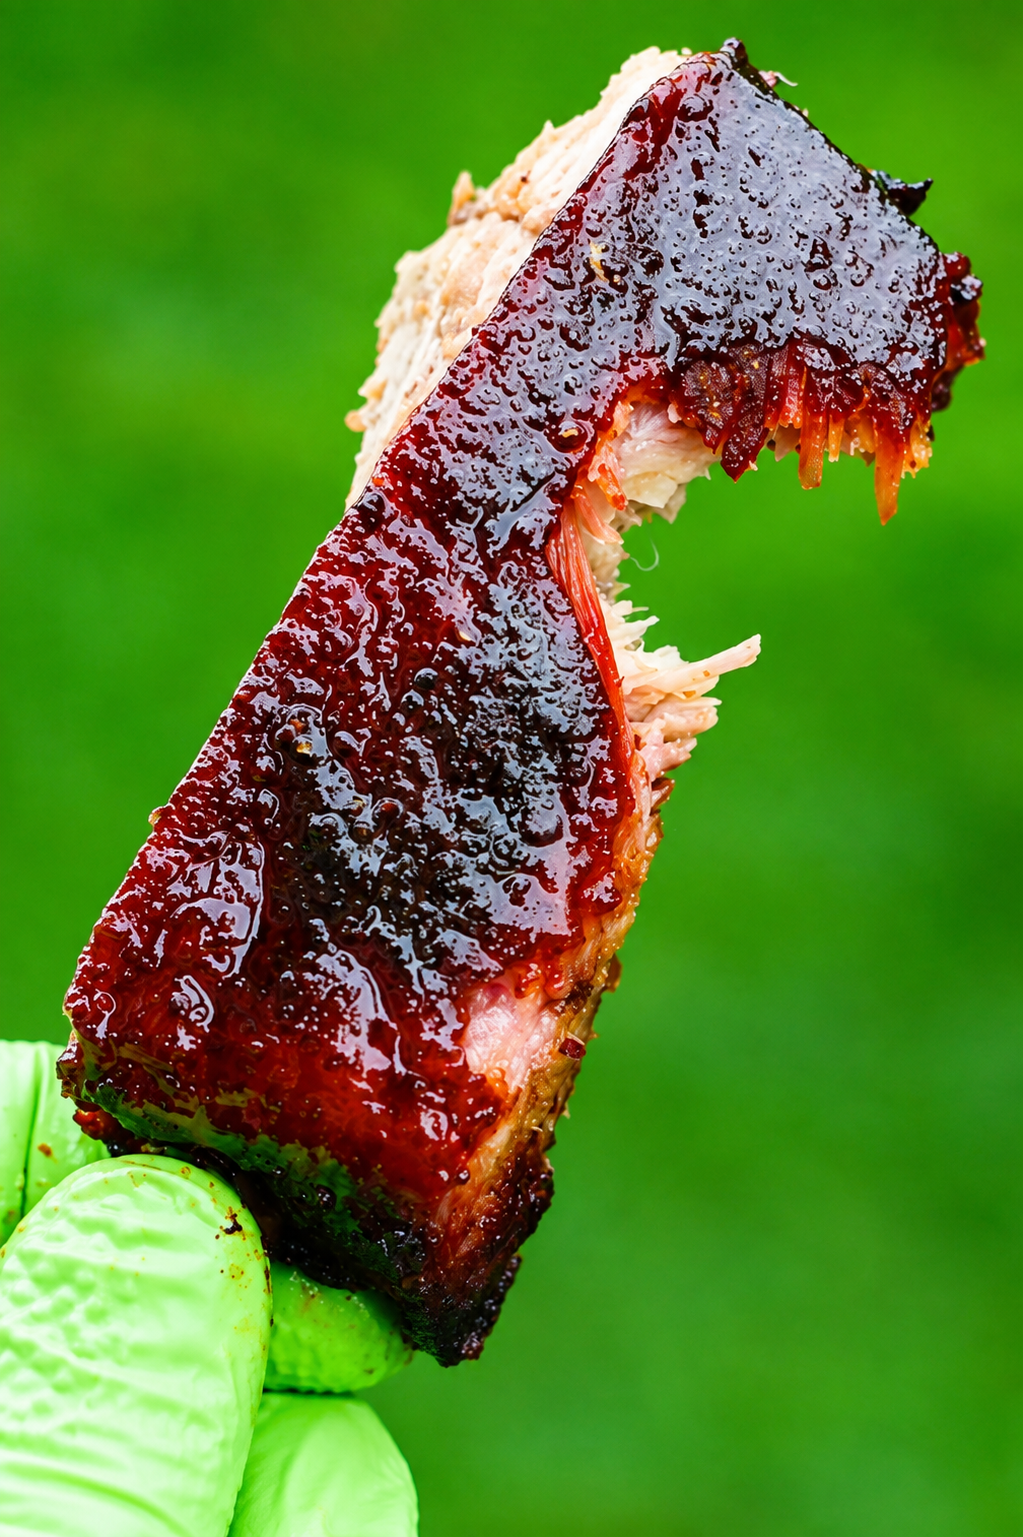
Internal temperature is useful, but it’s only part of the equation. I start checking the ribs around 195°F, looking for bone pullback and probing the meat between the bones for tenderness. If the probe doesn’t slide in with very little resistance, keep cooking. Depending on the rack, that may not happen until closer to 203°F.
Remember what we talked about earlier: tenderness is a function of both time and temperature. Hitting 200°F doesn’t automatically mean the ribs are done.
I go much deeper into internal temperature, probing, the bend test and bone pullback in my guide on how to tell when pork ribs are done.
Tips For Making BBQ Ribs On a Gas Grill
The Wrap: In order to get the ribs tender, and to save the beautiful color, be sure you wrap them tightly with foil or butcher paper.
The Thermometer: Don’t trust your grill’s thermometer, use a reliable leave-in thermometer so you know the temperature at the grill grates where the ribs are cooking.
The Smoke: Pellets or wood chips, fancy box or foil packet, just leave it over the direct heat of the grill and it will produce a nice smoke for your ribs.
The Moisture: Gas grills tend to offer a pretty dry cooking environment, because they don’t seal like a Kamado style grill. This means you’ll need to spritz the ribs often to keep them moist.
The Zones: Two zone cooking is a must, if you want more information about two zone cooking, I encourage you to read that blog.
The Lid: Keep it closed as much as possible. Once you close the lid, don’t be peeking in on the ribs, no matter how tempting. That lets the heat and smoke out.
The Doneness: Check here for an in-depth look into how to tell when pork ribs are done. The bottom line, they should be super tender and juicy, but not “fall off the bone.”
The Plan: Don’t just buy some ribs, and dive in. Do a test run with your grill and thermometer first. Know what position of the gas knob will achieve what temperature in the indirect zone of the grill. Don’t try to figure that out with ribs on the grill.
Overall: This blog is about the technique of setting up the grill. It’s not about the bbq sauce, the dry rub recipe, or the rib preparation or removing the membrane. For that information, I’d encourage you to read this blog about how to make barbecue ribs.
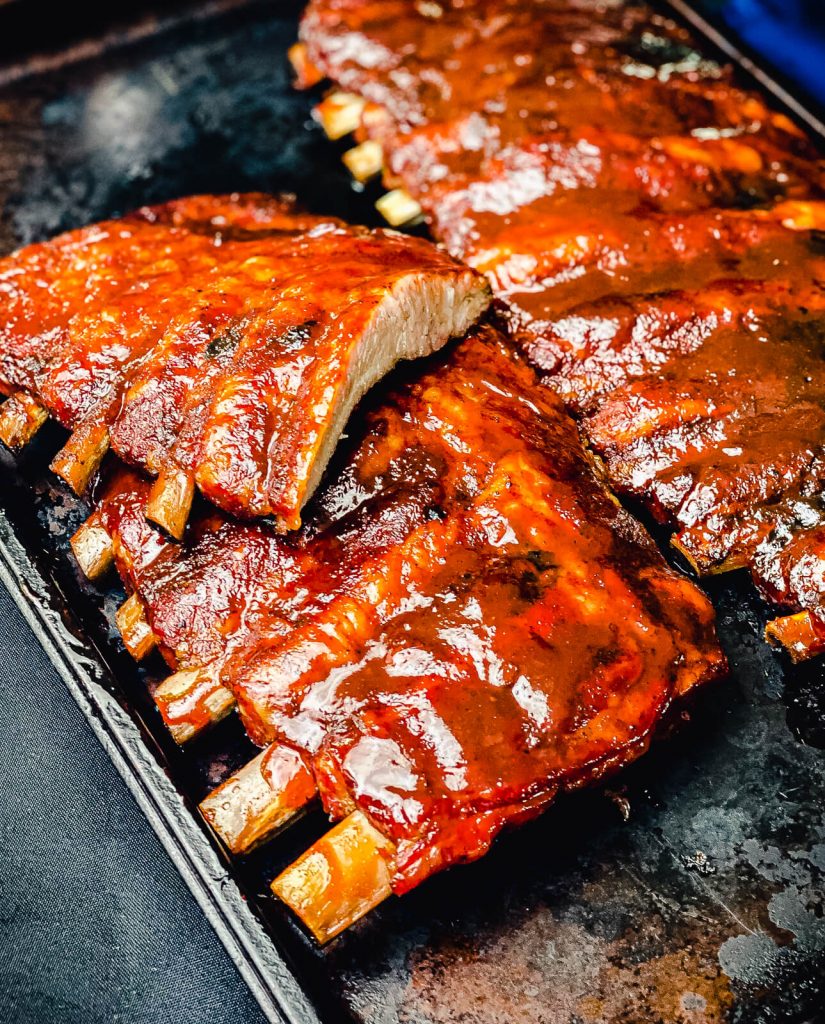
Smoking Ribs on a Gas Grill FAQ
No. A water pan can add moisture to the cooking environment for sure, but I don’t find it necessary for this method. Spritzing the ribs during the unwrapped portion of the cook provides the moisture I want without taking up more room on the grill.
No. I keep the ribs bone side down while they cook over indirect heat. Since there isn’t an active burner directly underneath them, there’s no need to keep flipping the rack like you would when grilling over raised direct heat.
Baby back ribs, St. Louis-style ribs and full spare ribs all work well on a gas grill. Baby backs are generally smaller and may cook a little faster, while St. Louis-style and spare ribs tend to be larger and meatier. The two-zone cooking method stays the same, so cook the ribs based on color and tenderness rather than relying only on time.
I recommend removing the membrane from the bone side of the ribs before seasoning them. It can become chewy when cooked and also prevents the seasoning and smoke from reaching that side of the rack as effectively. For more on removing the membrane and preparing ribs, see my complete guide on how to make barbecue ribs.
<div>
How To BBQ Ribs On A Gas Grill
Prep Time: 20 minutes | Cook Time: 3.5 Hours | Serves: 4
Ingredients
2 racks of spare ribs
1/4 cup Grillseeker BBQ Rub (or your favorite bbq rub)
3/4 cup favorite barbecue sauce, I prefer my easy homemade sauce
1/2 cup apple juice
1/2 cup apple cider vinegar
Step 1: Light one burner of your grill, place the pellets or wood chips over the active burner and close the lid. Allow the temperature to stabilize in the grill at 255°F as indicated with a reliable leave-in thermometer.
Step 2: Place the seasoned ribs, bone side down on the grill over indirect heat. Close the lid and let them go for 45 minutes without peeking.
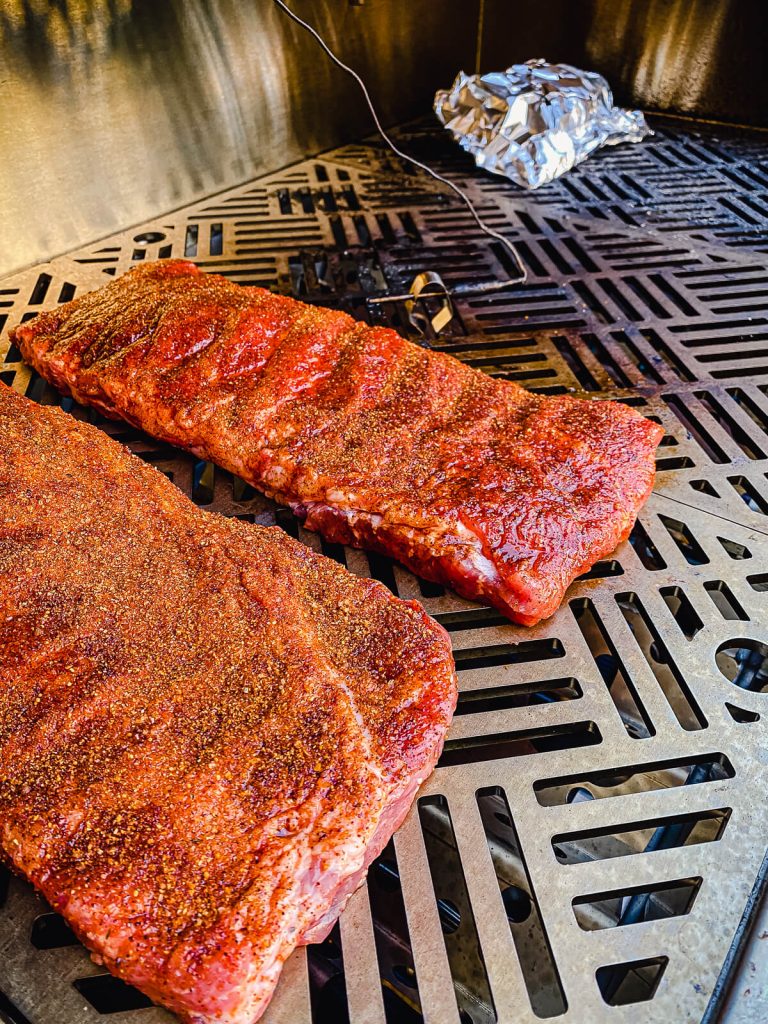
Step 3: While the ribs are on the grill, mix the apple juice and vinegar into a spray bottle. After 45 minutes on the grill, spritz the ribs for the first time. I like the flavor this combination adds, but the main purpose of the spritz is keeping the surface of the ribs moist. Plain water will work too.
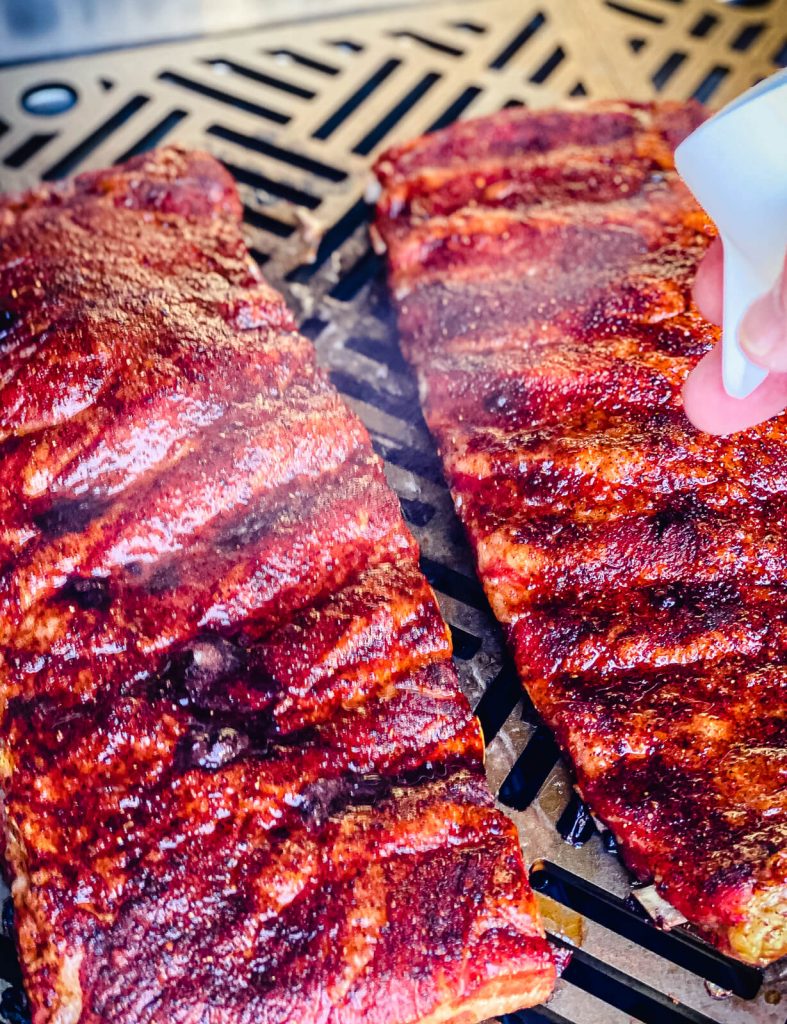
Work quickly and close the lid as soon as possible. Then, spritz the ribs every 20 minutes until the ribs have been on the grill for about two hours total. This can change by a few minutes either side of two hours, depending on the color of the ribs.
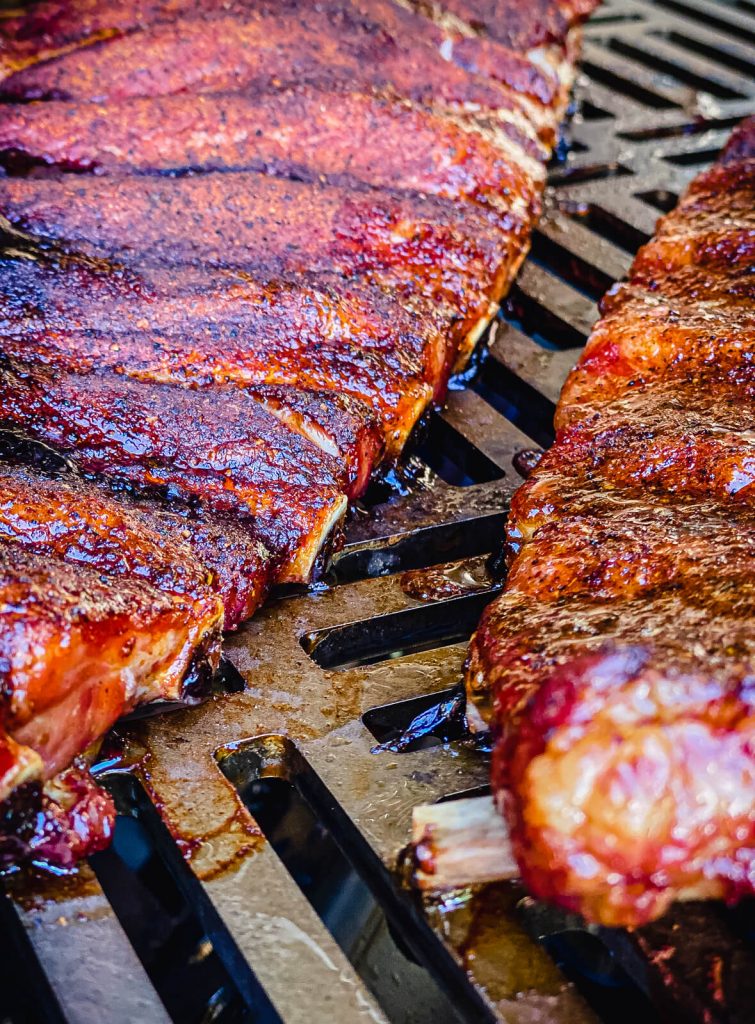
Step 4: Remove the ribs from the grill, close the lid and adjust the heat to maintain 285°F. The ribs should have a nice color and should bend slightly when held.
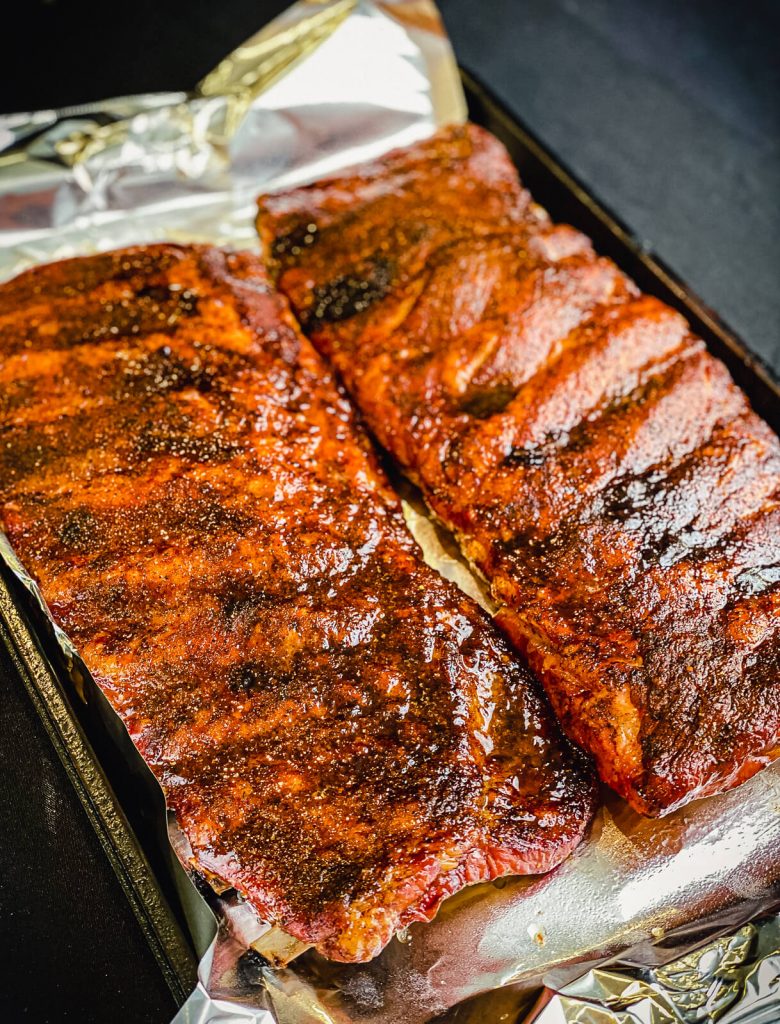
While the grill is heating up, wrap the ribs tightly in aluminum foil or butcher paper. Before sealing up the wrap, add a couple tablespoons of the juice and vinegar mixture to the ribs. This helps to get them tender.
Tip* If you like a sweeter rib, also consider adding some butter, honey, and brown sugar to the wrapped ribs. This is pretty common in the world of barbecue.
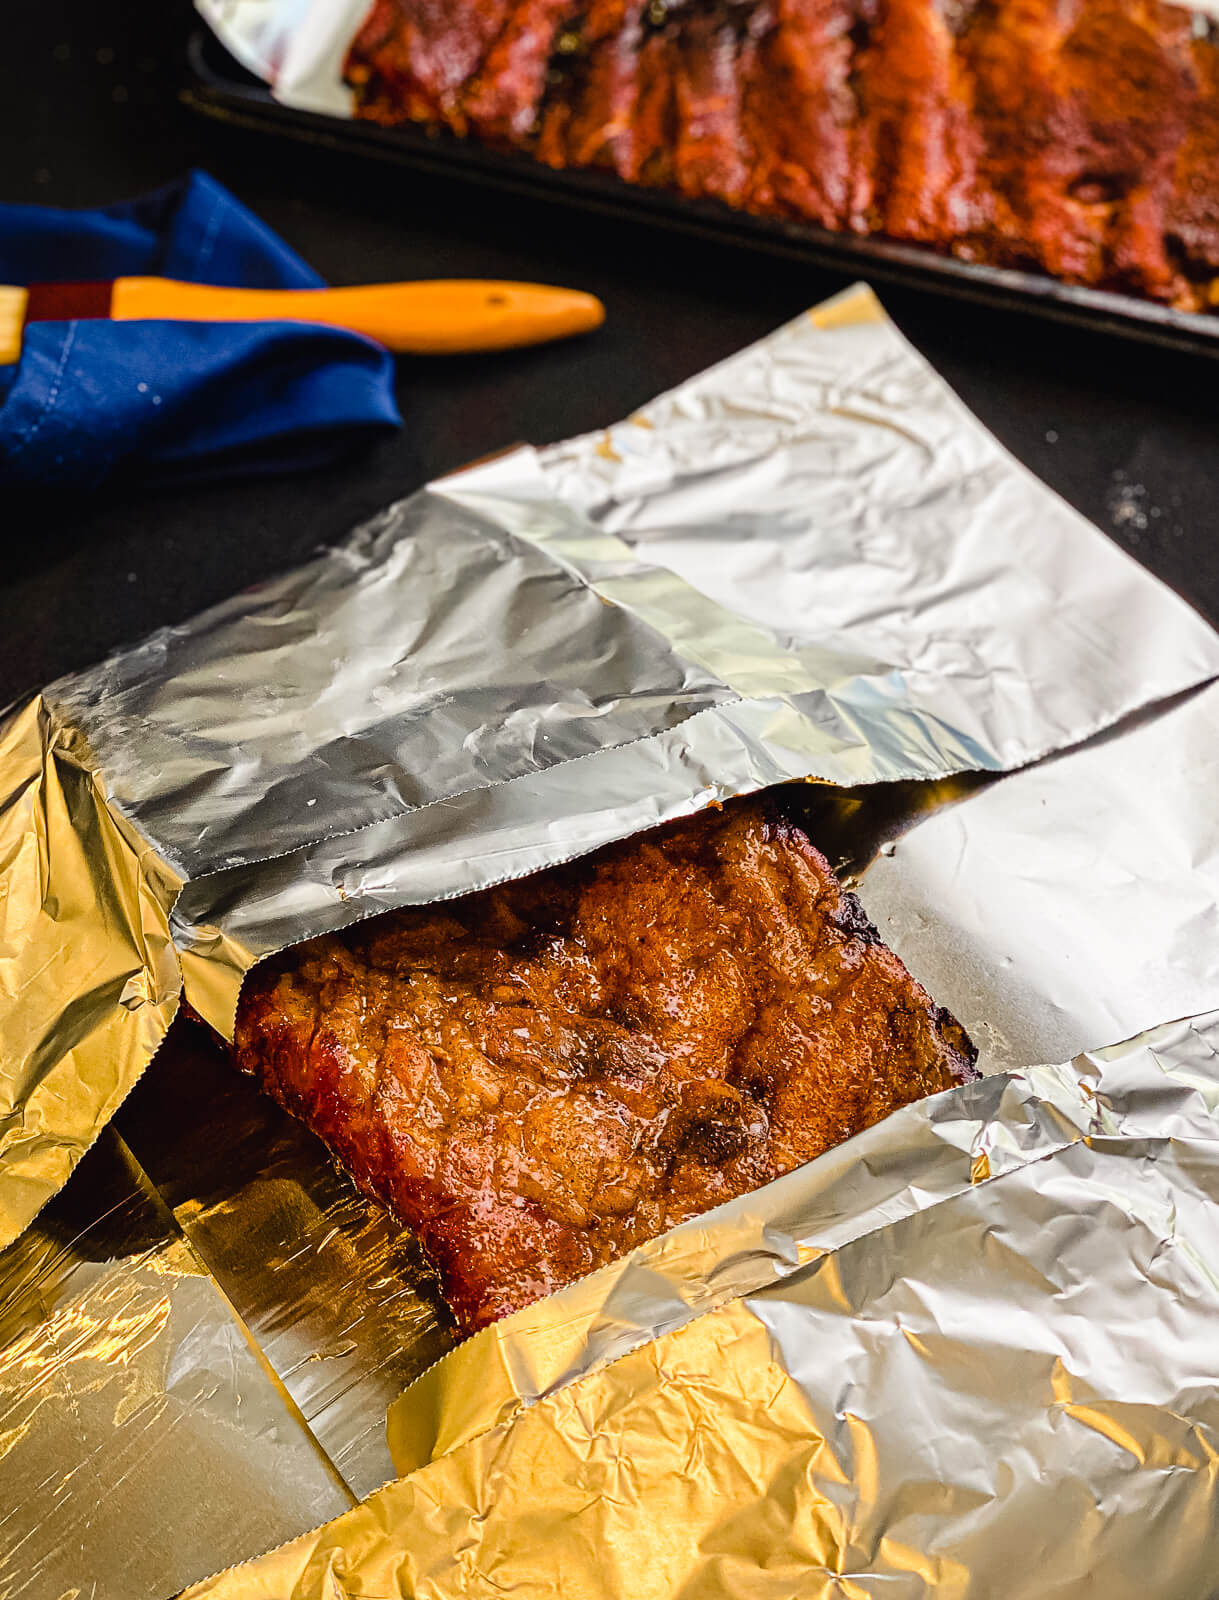
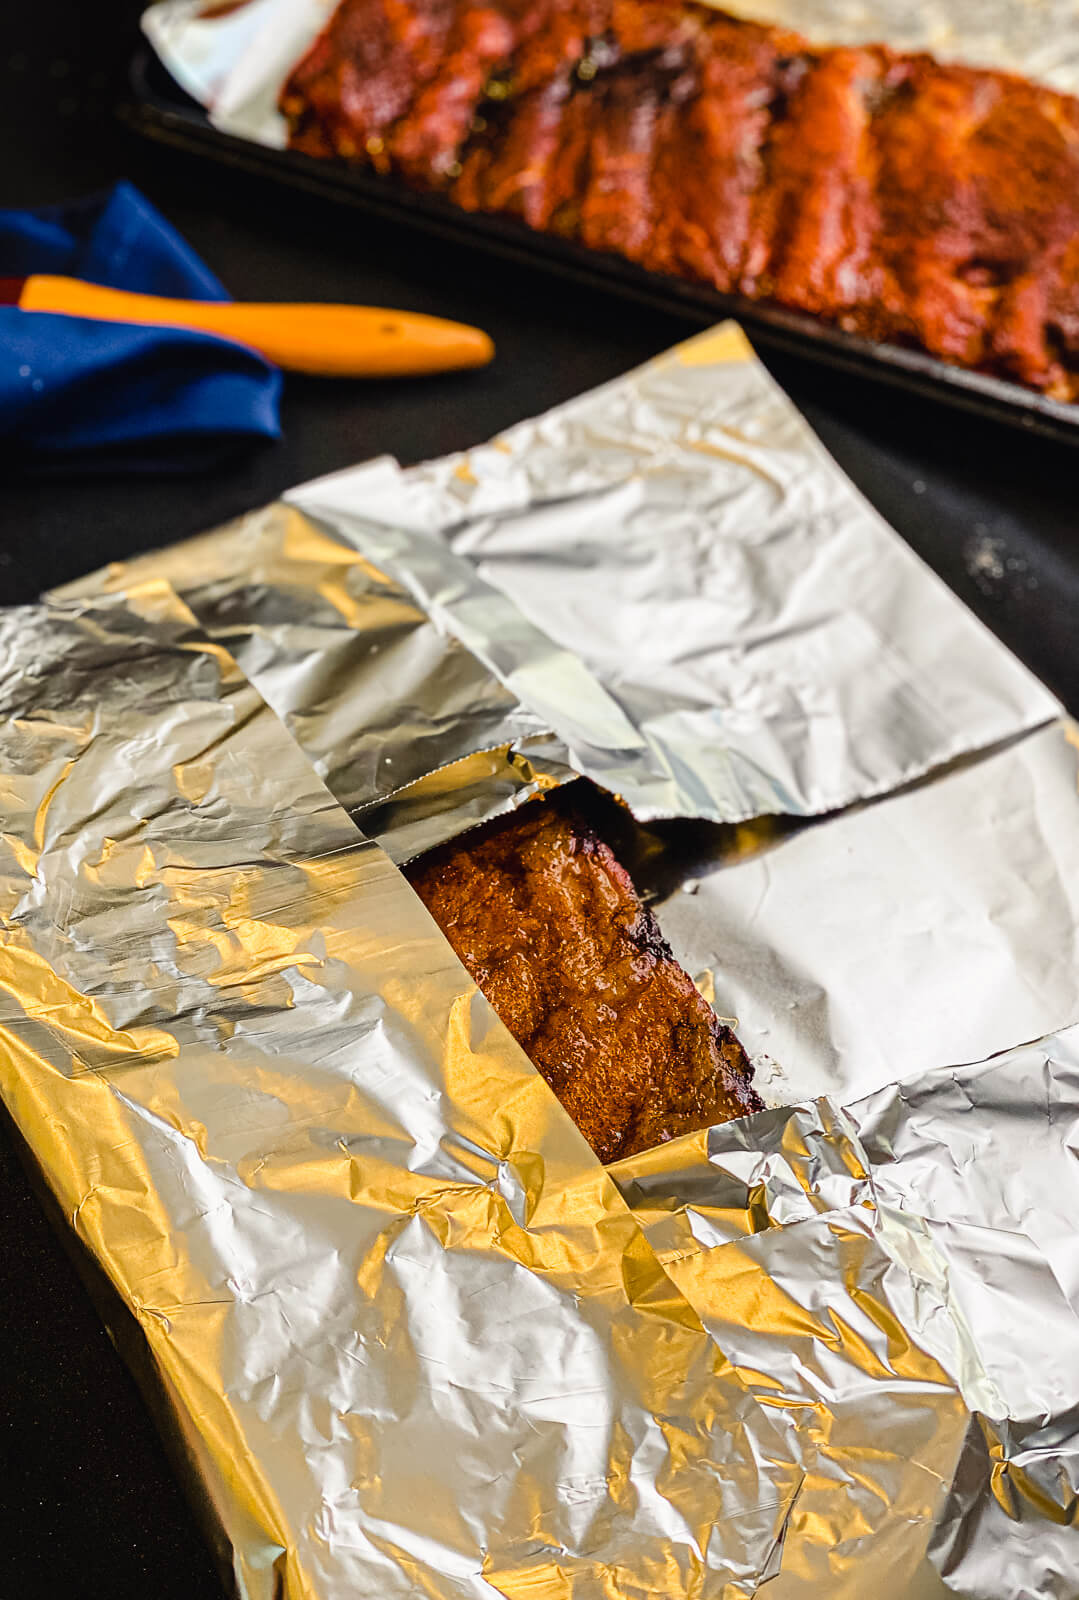
Step 5: Place the wrapped ribs back over indirect heat and close the lid. Cook for about one hour, then start checking for tenderness around 195°F. The ribs are ready to unwrap when a probe slides easily between the bones. If they aren’t tender, let them go, and check again every 15 minutes.
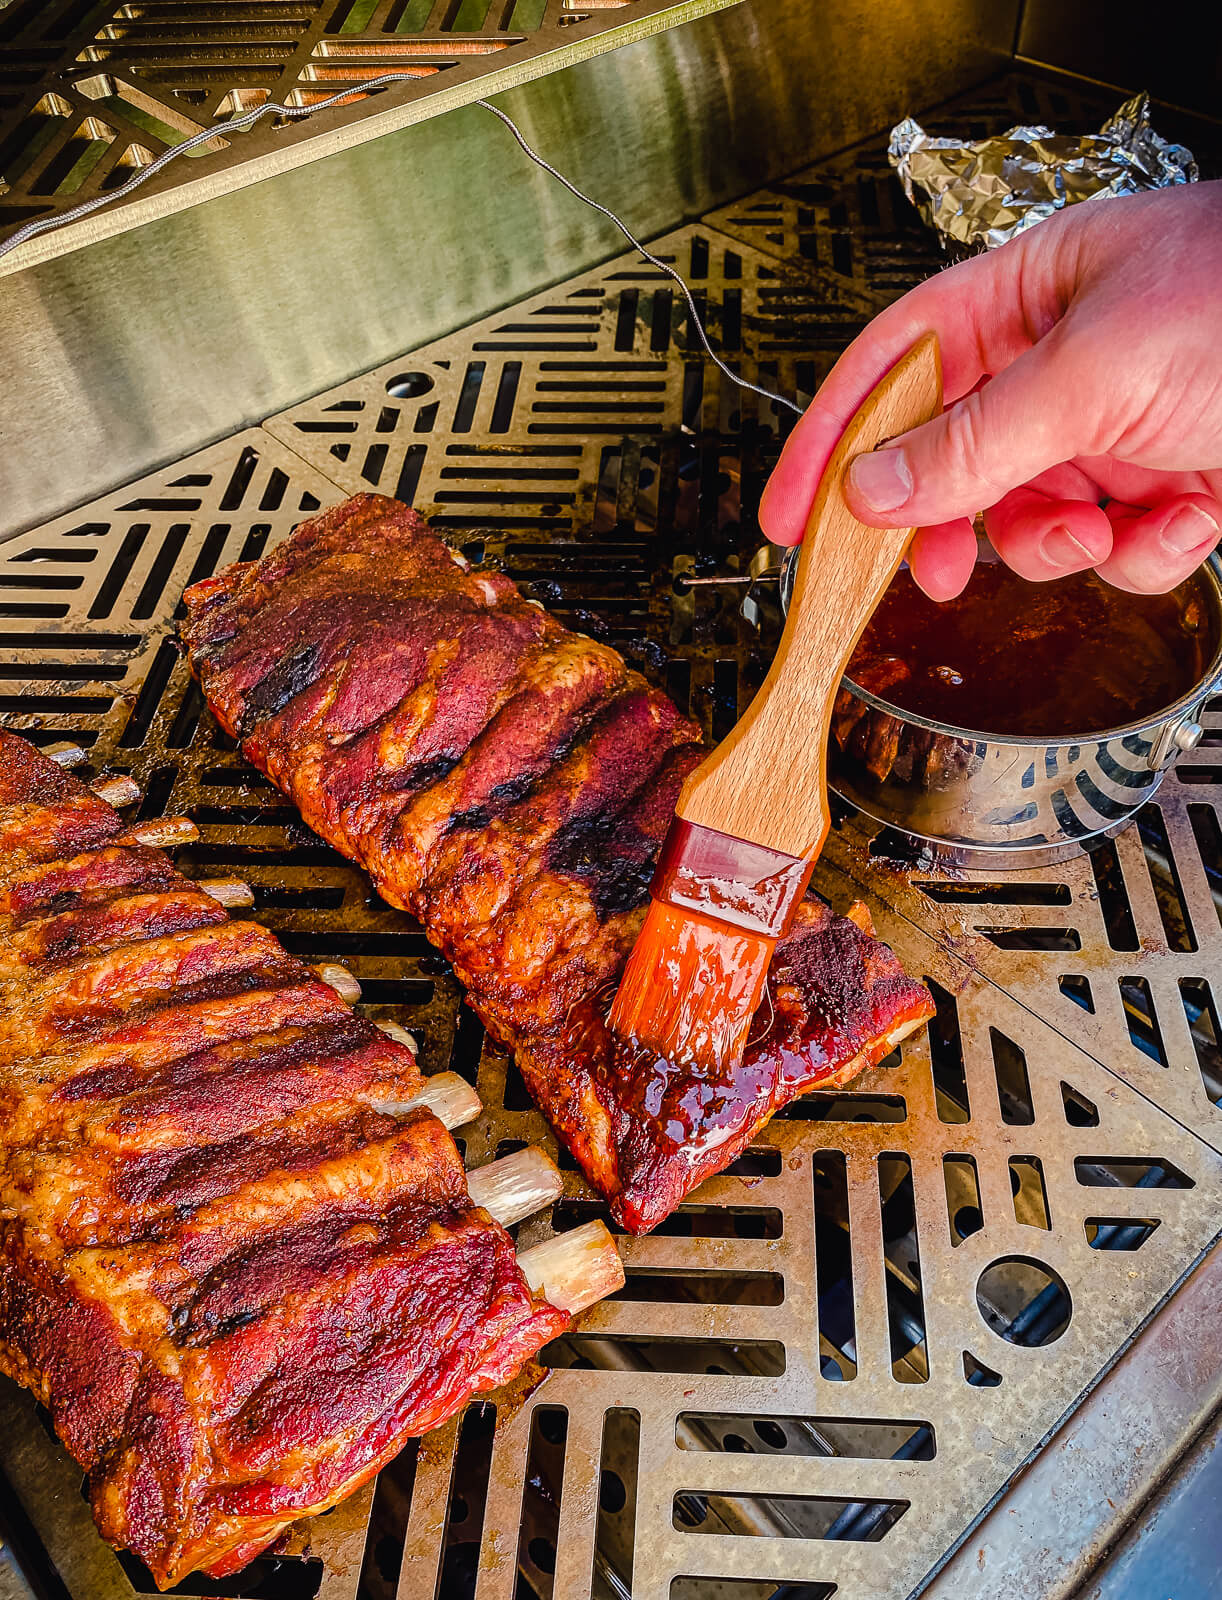
Step 6: Remove the wrapped ribs from the grill and close the lid. Unwrap the ribs, and return them back to the grill over indirect heat. Brush the ribs with your favorite barbecue sauce, close the lid and let them cook for about 20 minutes, or until the sauce has set and become tacky.
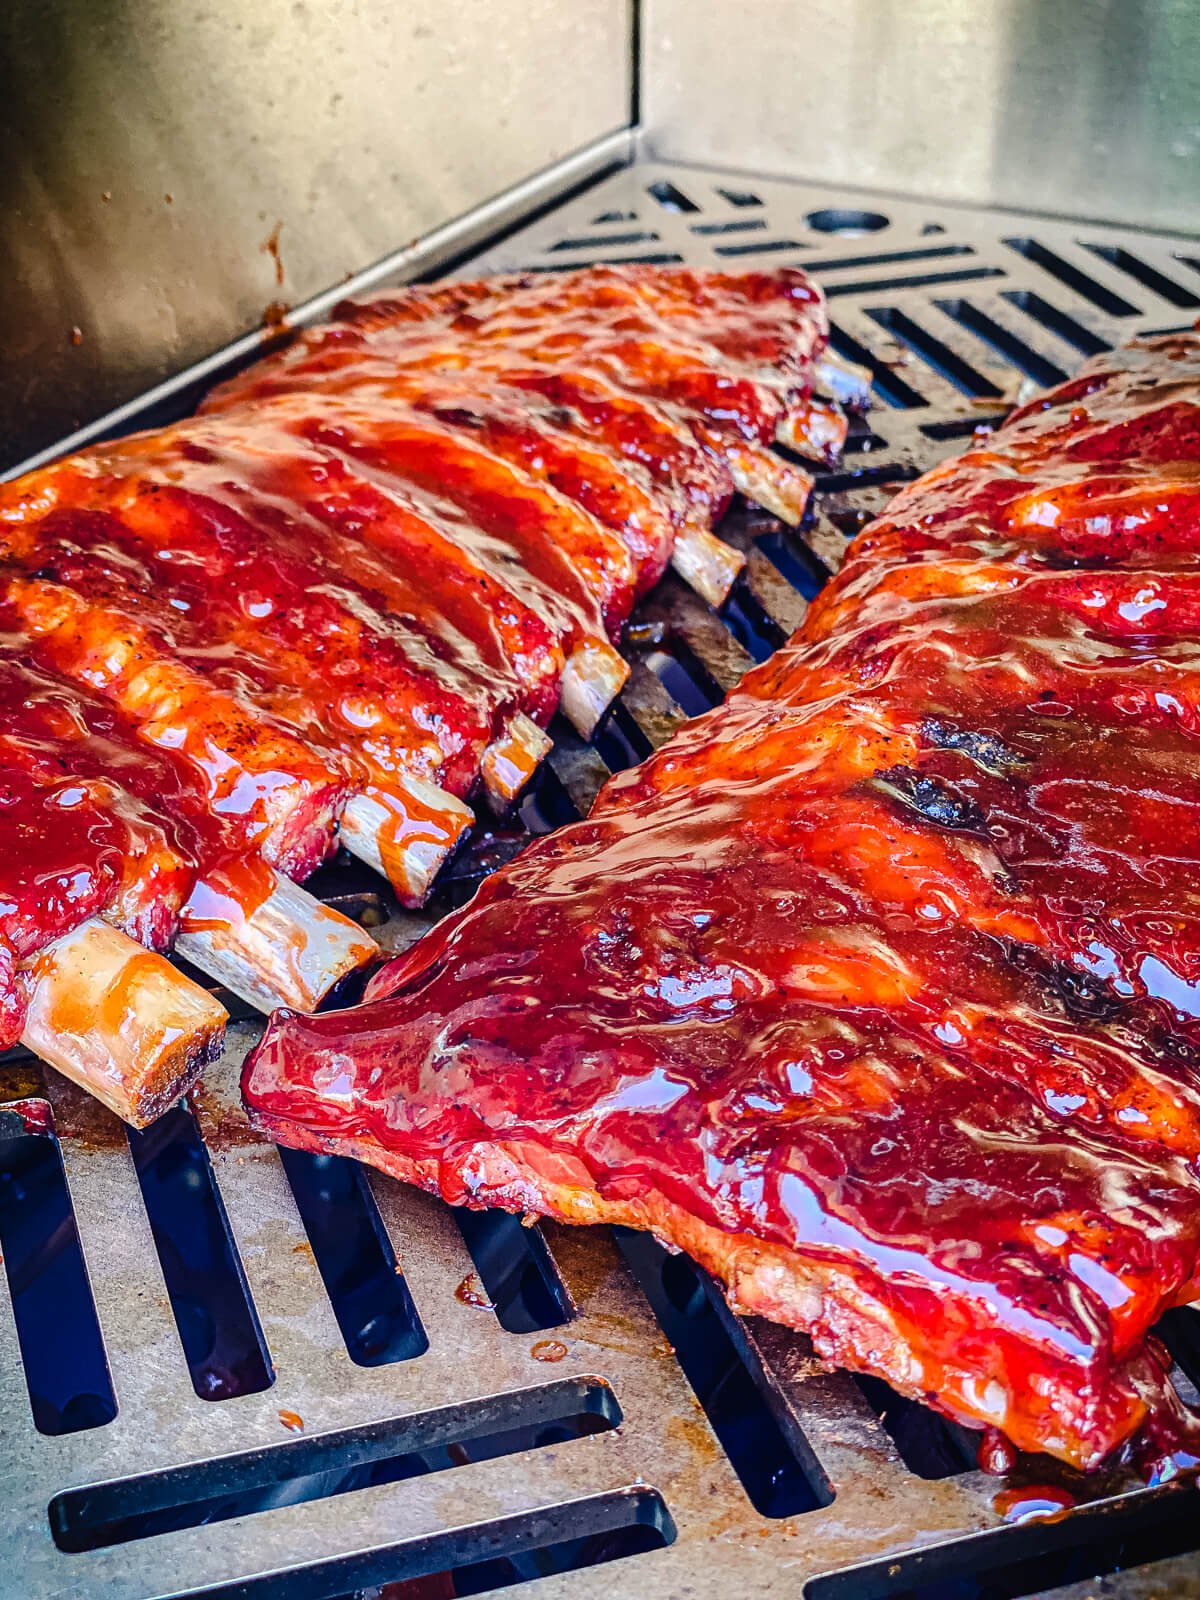
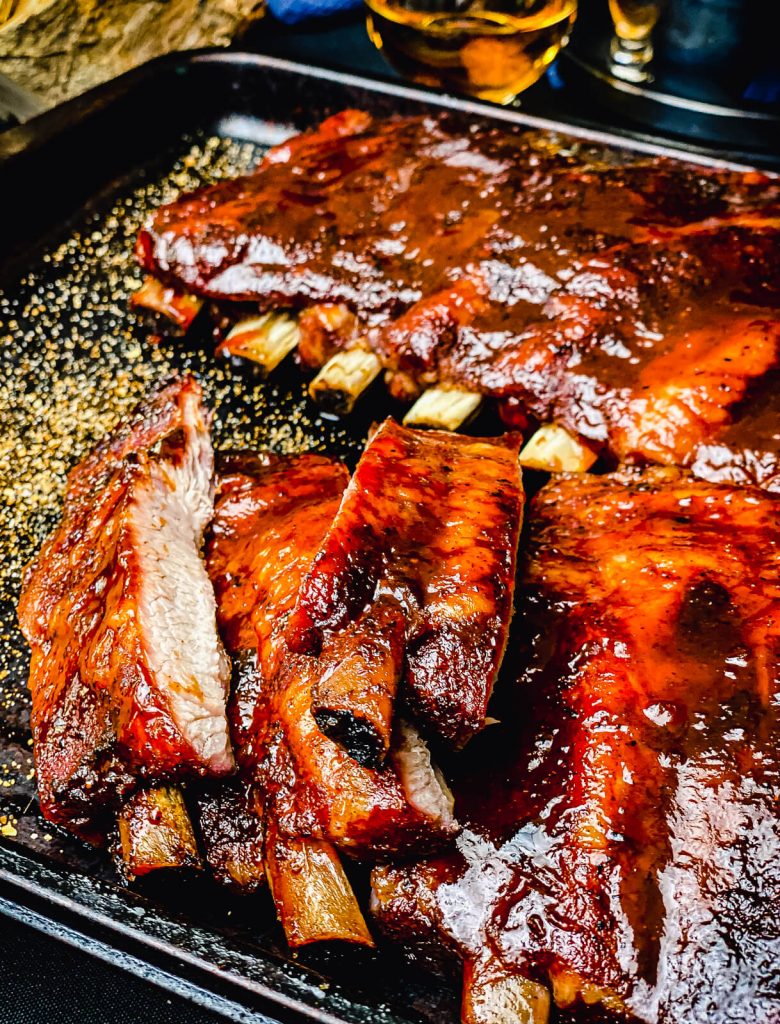
Step 7: Remove the ribs, lets them rest for 10 minutes, then slice and serve.
Thanks for the great thorough instructions. Normally I skip straight to the instructions but I’m glad I didn’t in this case. Ribs came out good. Better than oven but not at the smoker level (also didn’t take 6+ hours).
Thanks for checking this out, Nico. Definitely way better than using the oven but to you’re point, they aren’t like stick burner smoker style ribs. Gas grills are what the majority of people use, for various reasons. This is a great way to get as close to old school smoker ribs as possible while using the grill you have on hand. If you’re looking to save even more time, check out my 90 minute Memphis Style ribs.
Hey Devil Dog,
I have some on the grill right now. Did this twice before and they turned out awesome. I changed mine up just a little and keep them in the foil for about 4 hours at 200 (what my Webber says is 200). Anyway, other than that, I do all the rest. Really hard to get your wood chips going but I find that after taking the ribs off before putting them in foil I turn all burners to high to heat it up. Just make sure you turn the two off you are not using otherwise you end up with some of the stinkiest bunt ribs (speaking for a friend, lol).
Semper Fi,
Jason
Glad it’s working out for you Jason! Apologies to your “friend” with the burnt ribs, we’ve all been there. lol
-M
Instead of apple juice with vinegar try maple syrup with vinegar,
1 to 2 ratio, syrup to vinegar. Spray or paint unto ribs 2 or 3 times during final cooking time, about 2.5 hours.
Writing from Canada. Hi. My wife is having friends over and they want ribs. I plan to cook them as your recipe requires. My plan is cook them the day before up to the wrapping stage. After 1 hour, I plan to leave it wrapped and then remove it the following day to finish it with the glaze part. I only have have 1 Weber summit grill and I need to cook something on the day of the dinner.
Can I just unwrapped the ribs the following day, put in the grill, and glaze it the following day? By cooking it the day before, would it dry out? I hope to hear your thoughts.
bobbyt17@hotmail.com
Hey Bobby, Thank for checking out the blog and for your question. If I understand your plan correctly, I worry less about them drying out (though that is a concern) and more about color and overcooking. Putting cold ribs on the grill to glaze as opposed to glazing hot ribs is going to take a long time. The ribs have to warm through (which could cause them to overcook) and if you’re not super careful the color will end up being way to dark.If you try it, please let us know how it worked out for you. Id also say if that’s the plan, to leave the ribs wrapped when you put them back on the grill to warm them up, then unwrap and glaze. I’ve never done this so it will be an experiment for us both! Good luck!
-M
I followed your method to the letter using my Weber Spirit 2-burner grill with my own rub and sauce recipes. Best ribs I’ve ever done! Beautiful color. Perfectly tender and juicy.
That’s awesome David – so glad to hear it!
-M
Real glad i stumbled on this recipe. Followed the cooking instructions, especially the temperature and times and had the best ribs ever!
This recipe deserves more 5 star reviews.
Thank you Matthew for the grilling guidance!
Thanks for the kind words James, glad you enjoyed them!
-M
Got a3 burner and did this method with hickory chips and it was awesome I invested ina stainless steel pan for smoking and it is worth the effort i have done brisket and now these and it is as close to a smoker that i have found .Thanks for your service Hoo Raa!
Excellent Seth, so glad you liked them.
-M
How is the stainless steel pan used. Thanks, Andy
Thank You for posting this recipe
I have a 21 year old Viking 5 burner that’s new to me. I tried doing ribs on it once before and they didn’t turn out as well as these.
I now know to put the ribs on both cold burners and use the middle as my heat source. The ribs were so tender I could not finish the caramelization of the BBQ sauce on the grill. I transferred them to my Viking oven which has an amazing broiler
TURNED OUT FANTASTIC AND WILL DEFINITELY GO THIS ROUTE AGAIN
So glad to hear this worked out for you Scott!
-M
After years of burning ribs I my Weber gas grill I gave up. I bought some nice slabs of pork ribs at a butcher shop and searched online for a good cooking method. Using your rub recipe, temperature settings, wrapping the ribs in aluminum foil, and spritzing as directed I gave it a try. My ribs were outstanding. Restaurant quality or better. Glad I found your website. Next time I’m going to use some wood chips for smoking.
Thanks for this feedback Thomas! Really appreciate it and glad you enjoyed the ribs!
-M
I’ve been using this recipe for at least 2 years and it’s the one thing my husband requests I cook on the grill because I’ve mastered it!
I googled how to make “smoked” ribs on a gas grill & it looked perfect for what I wanted to do… and it was. Today I made the barbecue sauce mentioned in the recipe & it is really yummy. I didn’t want the hassle of making my usual one (Kingsford All-American Barbecue Sauce) so I thought I’d do this one with fewer ingredients.
Bottom line- you cannot go wrong with this method/recipe.
I tried posting pics on Instagram but it said it was a private account so I couldn’t.
I am getting ready to use this but I have a question about where is place the leave i thermometer. I have a three burner grill so but just using one for the heat source should I place the thermoter over the heat, in the middle or close to the ribs?
You’ll want to place your temp probe as close to where the ribs are cooking as possible.
-M
Thank you. that was what I was thinking but not sure.
Just started the grill up to make these. Wanted to see what other people thought of them.
I tried this and my ribs were still completely raw inside. I’m guessing it was a heat issue. I couldn’t find my leave in thermometer so I ran it slightly hotter than the rec temp since it’s very cold here. I probed the meat and it seemed like it was way over 165. I’m not knocking your recipe at all, just wondering if you have any advice for someone that is NOT good at grilling
Hi Nikki – So sorry to hear you had some troubles with you temps! A leave in thermometer is certainly very helpful if you’re able to find yours. That alone will solve 90% of your challenges. I would also encourage you to read this blog about knowing when ribs are done, I think you’ll find it helpful!
-M
Took a big risk attempting this for the first time on a dinner night with friends but happy to say it worked out REALLY well. Your instructions and other guides relating to this helped a lot.
I had to run the first stage for longer, 2.5hrs instead of 2, as I used a full rack of ribs that were much bigger than those spare ribs pictured, but it all worked out in the end.
Thanks a bunch!
So glad this worked out for you Sasha!
-M
Best Ribs that I ever made , thanks for the recipe!
That made my day Craig, thanks for sharing!
-M
I made this recipe for Memorial Day, and they came out awesome! Everyone really enjoyed the ribs. Thanks!
I love hearing this David, it’s amazing that a gas grill can put out such great ribs right? Thanks for checking it out!
-M
I plan on trying the recipe, but have a question. Your instructions say to wrap the ribs tightly, but the photos show a pretty loose wrap with some of the ribs exposed. Can you expain a little bit more about tbhe wrap that you suggest?
Hey Doug – thanks for the question. I think what you’re seeing that looks like ribs exposed in a loose wrap is the foil packet of smoldering wood pellets. The ribs themselves are wrapped pretty tight with no bones poking out. I hope this helps!
-M
Hands down the best and most reliable recipe. I’ve been using this for over a year now and it has not failed me once. Thank you!
Thanks Joe! Glad you’re enjoying them!
-M
This technique is bang on for ribs. Finally got some perfect ribs off my Weber gas grill over the weekend and couldn’t be happier. The foil packet was perfect, I added two of them just to be sure. lol
SO many folks miss out on ribs because the have a gas grill, glad to see this blob helped you out.
-M
Never in a million years thought I could make “smoked” ribs on my gasser. This was perfect.
Thanks for checking it out Donald, crazy what you can do with a gas grill right?
-M
Tried this out today, made my own dry rub but used this cooking method in my gas grill. First time smoking and I was shocked at how great these came out. Absolutely fantastic and better than my local bbq joints.
So glad it worked out for you Jeremy, thanks for checking it out!
-M
It was so easy to follow . My first time making ribs on the Weber gas grill. They turned out amazing , my family loved them and now they want me to make them for our camping trip.
You’re basically a pitmaster ready for the next season of BBQ Brawl, this is awesome! Thanks for sharing Nancy, outstanding job!
-M
Never thought it would be possible, but these turned out great. I used one of the smoke tubes off Amazon and I’m a believer!
Thanks for checking these out Cliff, those smoke tubes work really well!
-M