
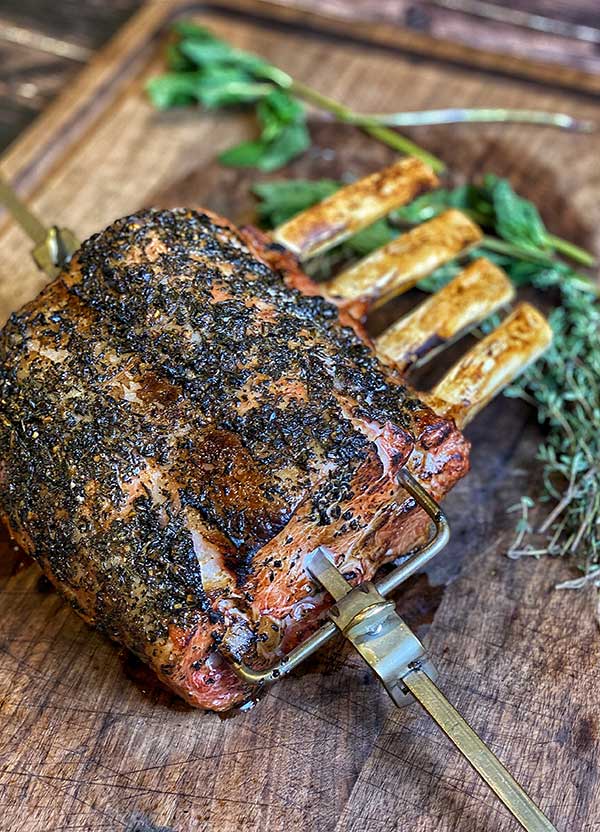
Veal is one of those proteins people either swear by or refuse to try. For the naysayers: once you actually try it, especially prepared this way, it usually changes minds fast. Herb crusted rack of veal is mild, incredibly tender, and surprisingly delicate.
This recipe gives you two reliable ways to cook rack of veal. If you have a rotisserie, great. If you don’t, the reverse sear method delivers excellent results without any special equipment.
How to Cook a Rack of Veal (Two Proven Methods)
Rack of veal can be cooked successfully with or without a rotisserie. In this blog, I’ll walk through both a rotisserie method and a reverse sear method so you can choose what works for you. Either way, the goal is gentle heat, even cooking, and a flavor packed herb crust.
Both methods rely on indirect heat to slowly bring the veal up to temperature. From there, the rotisserie self-bastes the meat while the reverse sear finishes with a short blast of high heat for crust development.
Does Veal Taste Different Than Beef?
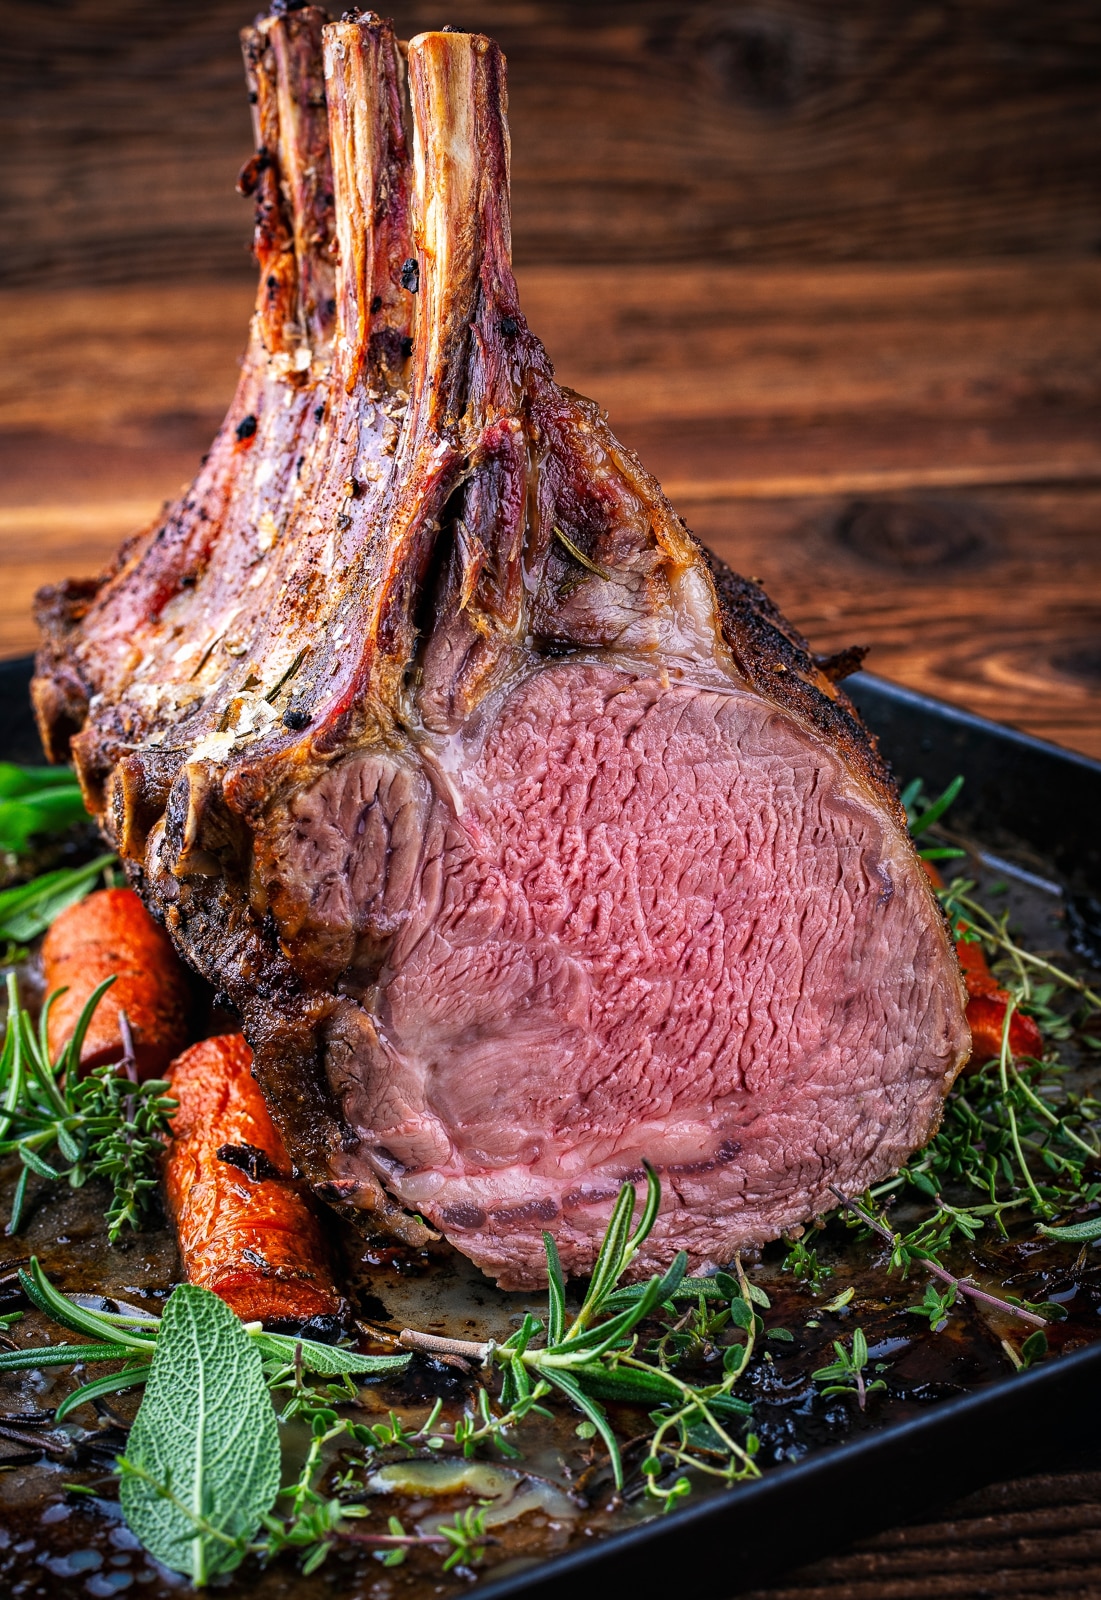
Yes, veal tastes noticeably different than beef. While the structure of a rack of veal looks similar to a small prime rib roast, the color is lighter and the flavor is noticeably more delicate. Many people describe veal as closer to pork than beef in both flavor and texture, and I wouldn’t disagree with that.
Veal is also extremely tender because the muscles have not worked as hard or as long. That tenderness is why so many people love veal.
What Is the Best Way to Cook Veal?
Veal is incredibly versatile and can be oven roasted, grilled, pan fried, or braised. For large cuts like a rack of veal, grilling over indirect heat delivers the best balance of flavor and control. The grill also allows you to layer in subtle smoke without overwhelming the meat.
A rotisserie is excellent because of the self basting that happens with this method. That said, a reverse sear setup using indirect heat works exceptionally well and is far more accessible for most home cooks who don’t have a rotisserie. You really can’t go wrong with either method.
What Temperature Should Rack of Veal Be Cooked To?
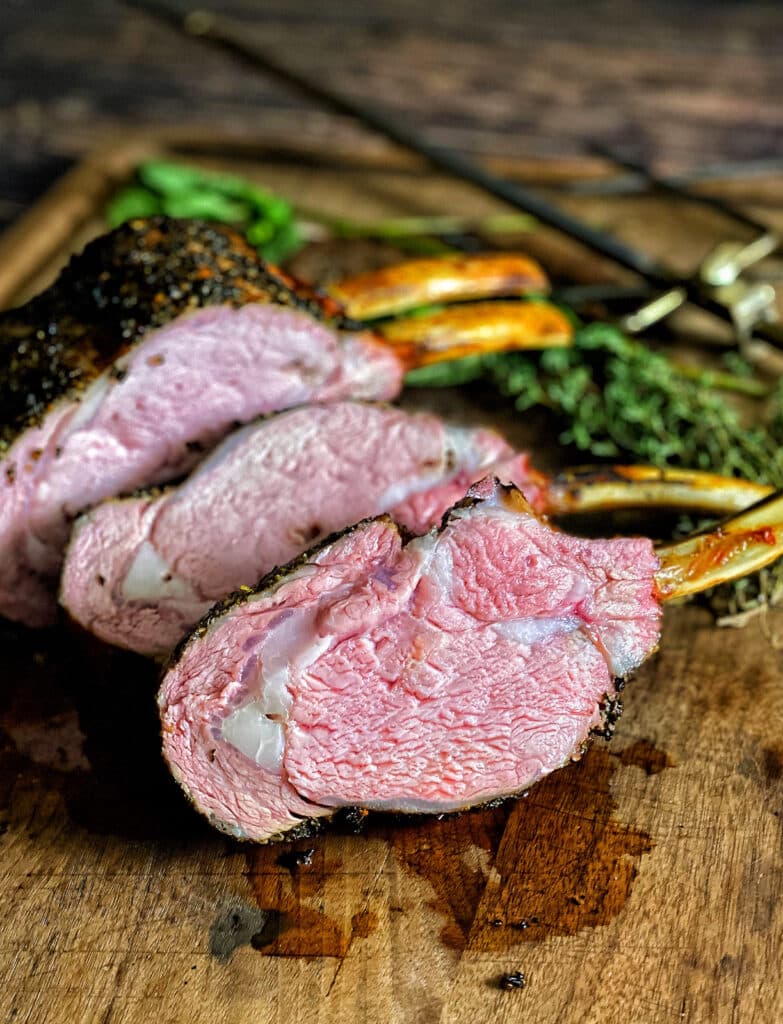
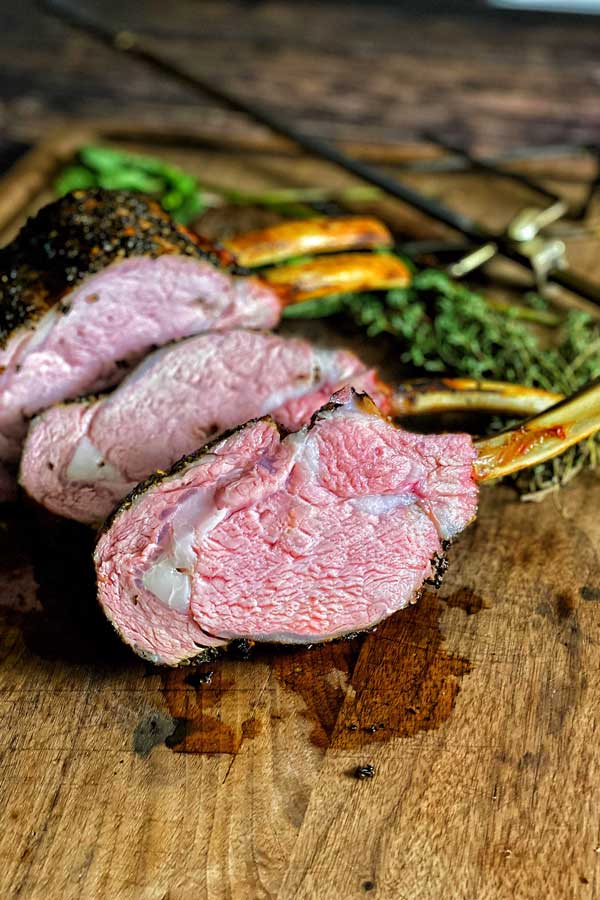
Rack of veal is best cooked to medium-rare or medium. I pull it off the grill at 125°F to 130°F and let carryover cooking finish the job. After resting, the final temperature lands right where it should.
Because veal is lean, pushing it too far past medium can dry it out quickly. A reliable meat thermometer is not optional here.
Grilled Herb Crusted Rack of Veal
Serves: 6 | Prep Time: 20 mins | Cooking Time: 90 min
Ingredients
For the Veal:
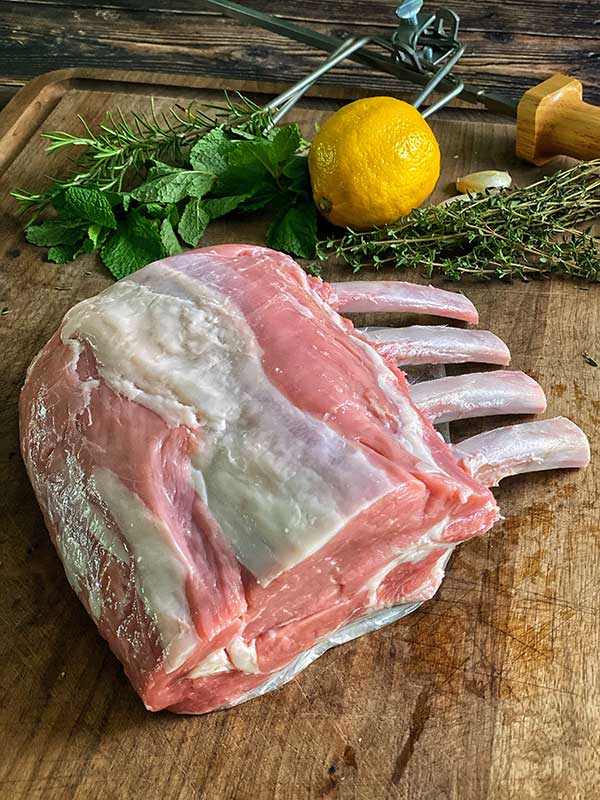
1 4-5 pound rack of veal (Frenched)
3 tbsp minced garlic
2 tbsp fresh rosemary (finely chopped)
2 tbsp fresh mint (finely chopped)
2 tbsp fresh thyme (finely chopped)
Zest from one lemon
2 tsp kosher salt
1 tsp fresh cracked pepper
1/4 cup olive oil
For the Grill:
Scraps from herbs
1 medium onion (quartered)
5 cloves of garlic
3-4 sprigs of rosemary
Step 1: Strip all fresh herbs off stalks and finely mince. Don’t discard any of the herb stalks.
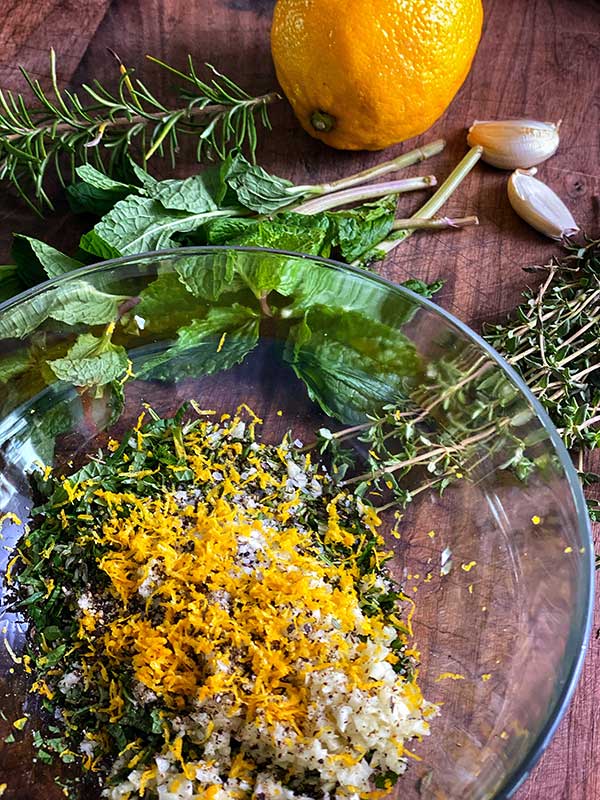
Step 2: In a small bowl, mix herbs with salt and pepper and add the olive oil to form a paste.
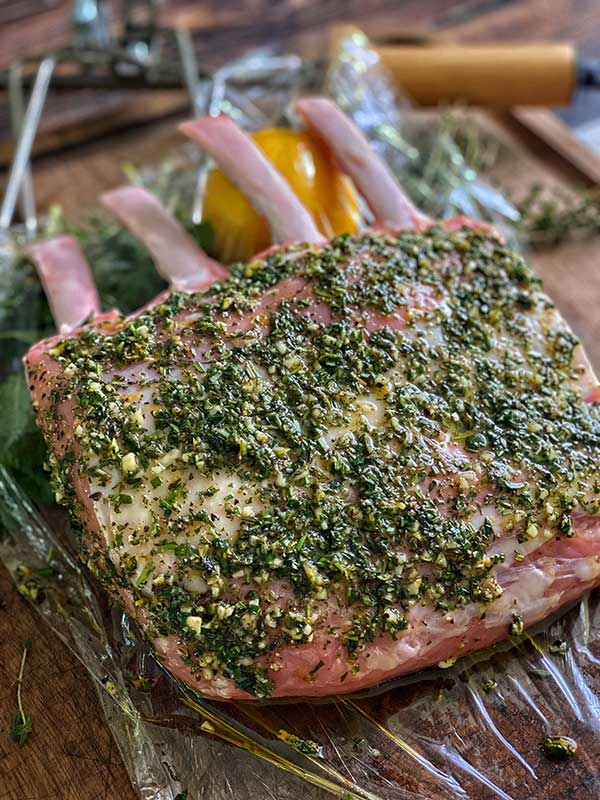
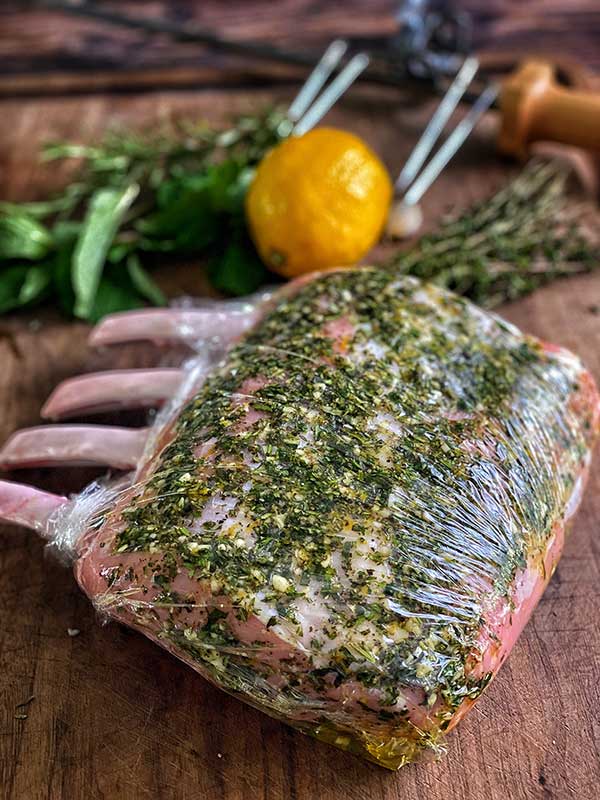
Step 3: Place the rack of veal on a sheet of plastic wrap and smear the herb paste all over the surface of the veal. Wrap veal with plastic wrap, place on a plate and put in the refrigerator for 2 hours, or overnight.
Step 4: Remove the veal from the refrigerator and set it on the countertop for up to an hour, while you prepare your grill.
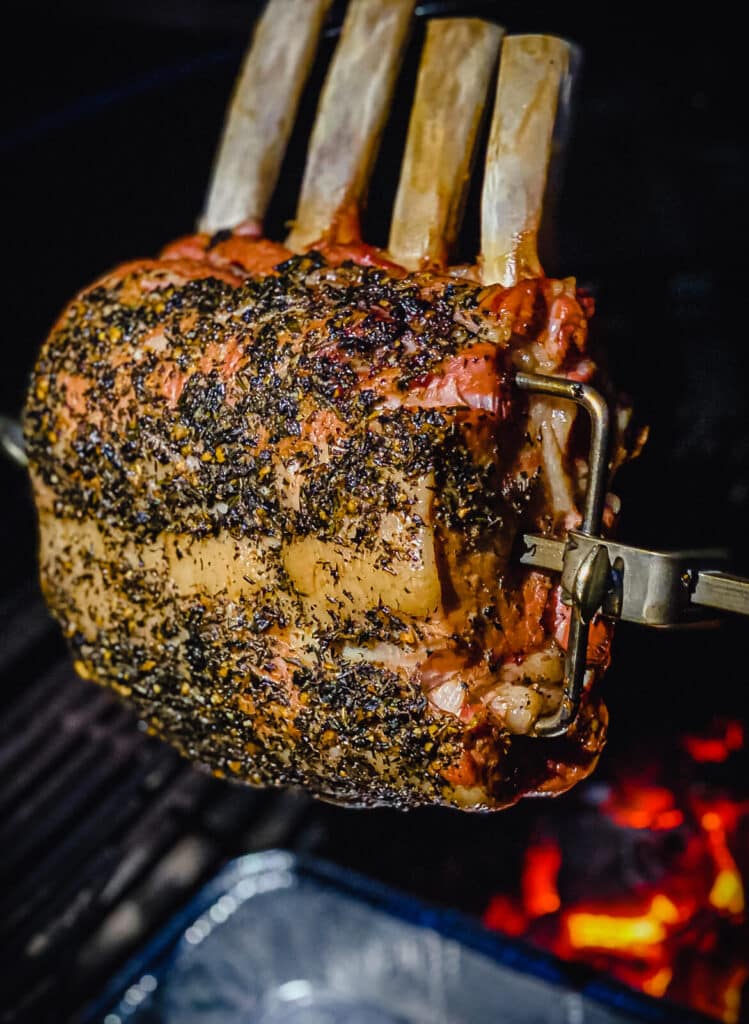
Step 5: Light grill, and using a reliable thermometer, set grill temperature to 275°F – 300°F. For a charcoal grill, build the coal bed so the majority of the coals are offset of where the rack of veal will spin, with only a few coals directly under the veal. For a gas grill, use the infrared rotisserie burner.
Step 6: Leaving the veal wrapped in plastic to ensure the herbs don’t get wiped off, insert spit through the center of the veal. Then, remove the plastic and insert the prongs into the meat.
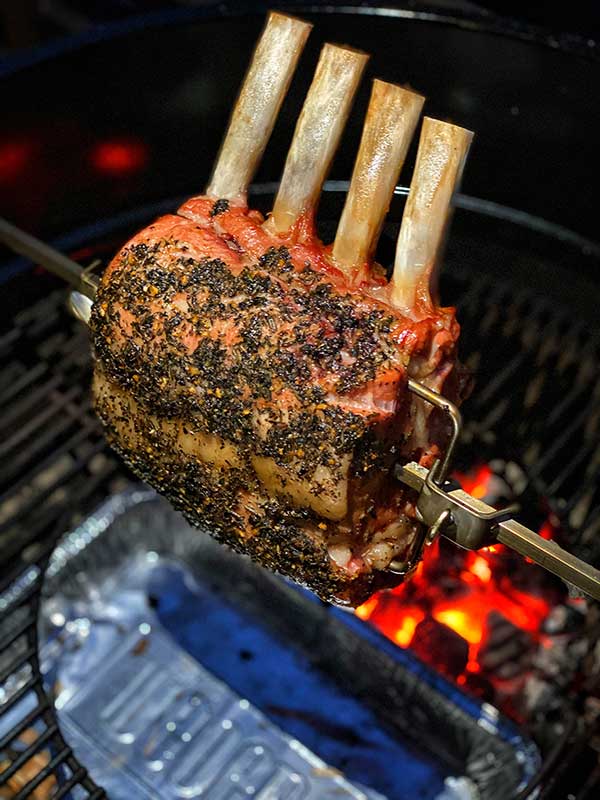
Step 7: Place the rotisserie spit on the grill. Add the onion quarters, rosemary, garlic, and scraps from the herbs to the hot coals. Close the lid on your grill, allowing herb smoke to go to work on the rack of veal. Monitor your meats temperature about every 15–20 minutes using a reliable quick-read thermometer.
Step 8: When the internal temperature reaches 125°F-130°F, remove the veal from the grill.
Step 9: Let the veal rest for 5-10 minutes and allow the carryover cooking to work its magic, before cutting into it.
For Reverse Sear Method:
Step 1: Strip all fresh herbs off stalks and finely mince. Don’t discard any of the herb stalks.
Step 2: In a small bowl, mix herbs with salt and pepper and add the olive oil to form a paste.
Step 3: Place rack of veal on a sheet of plastic wrap and smear the herb paste all over the surface of the veal. Wrap veal with plastic wrap, place on a plate and put in the refrigerator for 2 hours, or overnight.
Step 4: Remove the veal from the refrigerator and set on the countertop for up to an hour while you prepare your grill.
Step 5: Light your grill, and set up for two-zone cooking. Using a reliable thermometer, set grill temperature to 225°F.
Step 6: Insert a reliable leave-in thermometer into the thickest portion of the rack of veal and place it over indirect heat, facing the bones towards the heat source.
Step 7: Place onion quarters, rosemary, garlic, and scraps from the herbs on the coals. Close the lid on your grill allowing herb smoke to go to work on the veal roast.
NOTE: If you’re using a gas grill, wrap all of those items in aluminum foil. Poke holes in the foil packet with a fork and place over gas burner. This will allow the smoke to escape and bathe the veal.
Step 8: When the internal temperature reaches 125°F, remove the veal from the grill and prepare the grill for high direct heat; adding more coals as necessary.
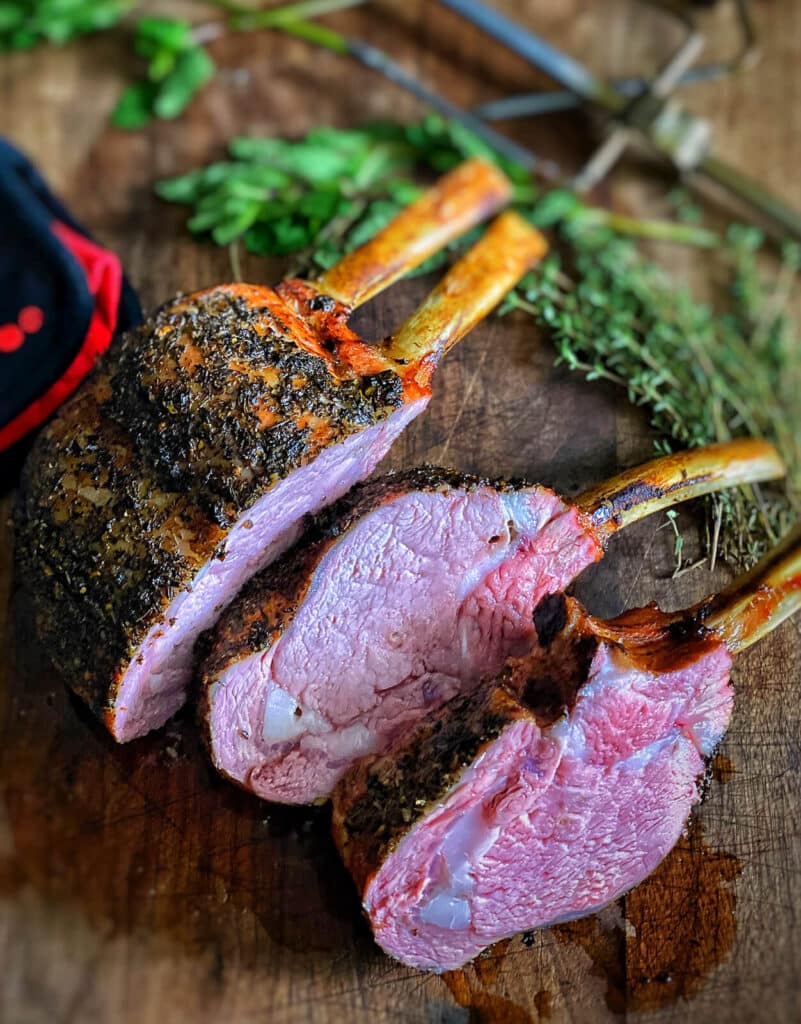
Step 9: Place veal directly over high heat, turning often just until you achieve a nice dark crust. About four minutes total. This will achieve the perfect medium-rare. Remember, flip the meat often (about every 30 seconds or so) so all sides get kissed by the flame and you achieve that beautiful crust via the Maillard reaction.
Step 10: Let the veal rest for 5-10 minutes and allow the carryover cooking to work its magic, before cutting into it.
Grilled Veal FAQs
No. A reverse sear method works extremely well and gives you an amazing crust without needing a rotisserie.
Yes. Use an indirect heat setup and add onion, garlic, rosemary, and herb stems in a foil packet with a few holes poked in it to create light smoke.
Rack of lamb has a stronger, more distinct flavor. Rack of veal is milder and slightly sweeter, which makes it a great canvas for herbs, garlic, and lemon.
Ingredients
For the Veal
- 4-5 lbs rack of veal Frenched
- 3 tbsp minced garlic
- 2 tbsp fresh rosemary finely chopped
- 2 tbsp fresh mint finely chopped
- 2 tbsp fresh thyme finely chopped
- zest from one lemon
- 2 tsp sea salt
- 1 tsp fresh cracked pepper
- 1/4 cup olive oil
For the Grill
- Scraps from herbs
- 1 medium onion quartered
- 5 cloves garlic
- 3-4 sprigs rosemary
Instructions
- Strip all fresh herbs off stalks and finely mince. Don't discard any of the herb stalks.
- In a small bowl, mix herbs with salt and pepper and add the olive oil to form a paste.
- Place the rack of veal on a sheet of plastic wrap and smear the herb paste all over the surface of the veal. Wrap veal with plastic wrap, place on a plate and put in the refrigerator for 2 hours, or overnight.
- Remove the veal from the refrigerator and set on the countertop for up to an hour while you prepare your grill.
- Light grill and using a reliable thermometer, set grill temperature to 275°F – 300°F degrees. For a charcoal grill, build the coal bed so the majority of the coals are offset of where the rack of veal will spin, with only a few coals directly under the veal. For a gas grill, use the infrared rotisserie burner.
- With the veal still wrapped in plastic, insert spit through the center of the veal. Then, remove the plastic and insert the prongs into the meat.
- Place rotisserie spit on the grill. Add the onion quarters, rosemary, garlic, and scraps from the herbs to the hot coals. Close the lid on your grill allowing herb smoke to go to work on the veal roast. Monitor your meat's temperature about every 15–20 minutes using a reliable quick-read thermometer.
- When the internal temperature reaches 125°F-130°F, remove the veal from the grill.
- Let the veal rest for 5-10 minutes and allow the carryover cooking to work its magic, before cutting into it.
Reverse Sear Method
- Strip all fresh herbs off stalks and finely mince. Don't discard any of the herb stalks.
- In a small bowl, mix herbs with salt and pepper and add the olive oil to form a paste.
- Place rack of veal on a sheet of plastic wrap and smear the herb paste all over the surface of the veal. Wrap veal with plastic wrap, place on a plate and put in the refrigerator for 2 hours, or overnight.
- Remove the veal from the refrigerator and set on the countertop for up to an hour while you prepare your grill.
- Light your grill, and set up for two-zone cooking. Using a reliable thermometer, set grill temperature to 225°F.
- Insert a reliable leave-in thermometer into the thickest portion of the rack of veal and place it over indirect heat, facing the bones towards the heat source.
- Place onion quarters, rosemary, garlic, and scraps from the herbs on the coals. Close the lid on your grill allowing herb smoke to go to work on the veal roast.
- When the internal temperature reaches 125°F, remove the veal from the grill and prepare the grill for high direct heat; adding more coals as necessary.
- Place veal directly over high heat, turning often just until you achieve a nice dark crust. About four minutes total. This will achieve the perfect medium-rare. Remember, flip the meat often (about every 30 seconds or so) so all sides achieve that beautiful crust via the Maillard reaction.
- Let the veal rest for 5-10 minutes and allow the carryover cooking to work its magic, before cutting into it.
100
So, you leave the plastic wrap on the veal while cooking?????? Not for me then.
Thanks for checking this out Murphy, I appreciate that – I sort of assumed removing the plastic wrap before cooking it was a given, but I’ve updated the recipe to call out that specifically.
-M
The herb paste on this was perfect!
Thanks for checking it out Paige, those herbs are special for sure.
-M
For those of us who have to use a regular oven – any tips?