You’ve probably heard that you should sear your steak first to “lock in the juices.” That’s one of the biggest misconceptions about cooking meat. It’s certainly possible to sear first and then let your meat coast along until it’s your desired level of doneness, but the level of heat required to do that successfully is beyond what most home chefs have access to.
This method is known as “sear and slide” because you’re searing the meat over extremely high heat, then sliding it over to a cooler section of the grill to finish. It works, but only if the initial sear is done in the 950°F plus range. With few exceptions, only the very high end grills are capable of those temperatures. Most steakhouses do this style of cooking, using salamander-style cookers capable of 1500°F plus temperatures. This allows the meat to sear very quickly, so it isn’t exposed to the high heat for very long.
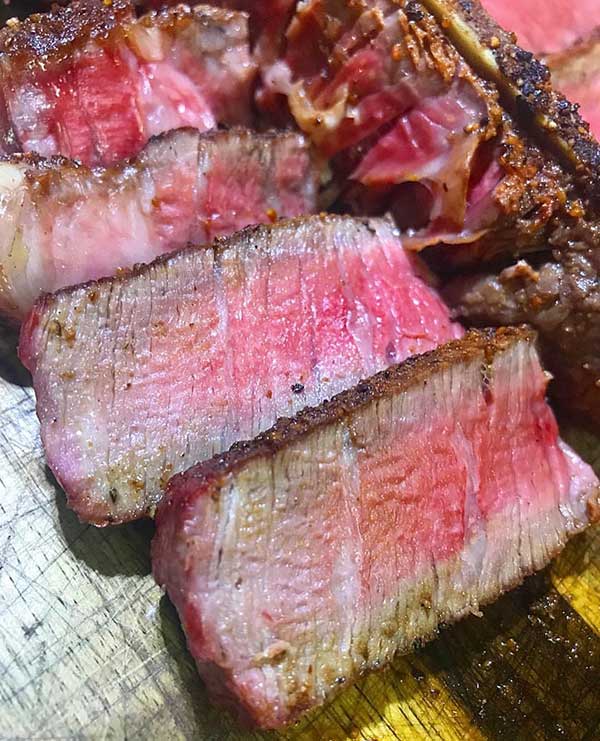
At the highest setting produced by most gas grills (usually around 600° or less) or even a cast iron pan over high heat on a stove top, the meat needs to stay over the hot section for an extended period of time to achieve the sear. This period of exposure to high heat is not only searing the outside but also cooking the steak through. By the time a proper sear has been achieved in this temperature range, the meat is well on its way to being overcooked on the outside half-inch or so. When slid into a cooler zone of the grill to finish off the inside of the meat, the outside of the steak will continue to cook from its long exposure to the high heat. The result, every time, is meat that has a ring of well done surrounding the middle cooked to medium rare—like below:
Anyway, I digress. So, what is reverse sear? Simple, as the name suggests, it’s cooking your meat in the reverse of the sear and slide method. See my tips at the end of this blog for the best results while using the reverse-sear method.
Why Does the Reverse-Sear Method Work?
In short, it reduces the time a protein is subjected to the extreme temperatures required to quickly sear. Cooking the meat slowly at first, in a cooler environment of around 225°F, does a few key things for us. First, it allows the temperature of the meat to rise slowly and evenly to prevent overcooking. Second, the warm environment dries the outer surface of the meat, so when it’s time to sear over high heat we don’t have to overcome the issue of moisture, which is found on the surface of raw meat. (Moisture by the way, is the enemy of searing because it causes steam.) Finally, we’re beginning the searing process at a higher meat surface temperature starting point. Logically then, the meat requires less exposure to those high temperatures required for searing.
Think of these extreme high temperatures as a fine wine or great cocktail. The right amount has you feeling perfect, but too much and you’re the sloppy drunk uncle at Thanksgiving. High heat can be your best friend—that feeling after the glass of wine or cocktail we mentioned, OR it can be the drunk uncle.
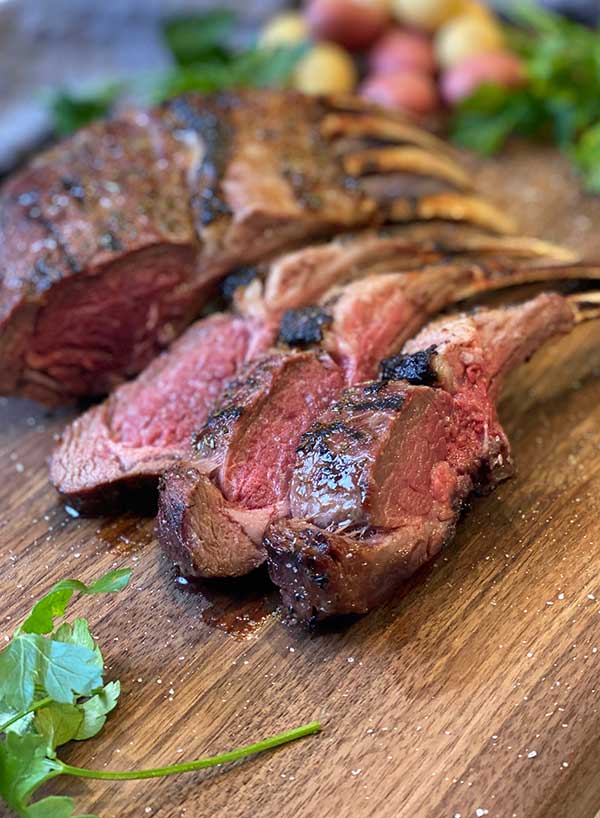
What Are the Benefits of Using the Reverse-Sear Method?
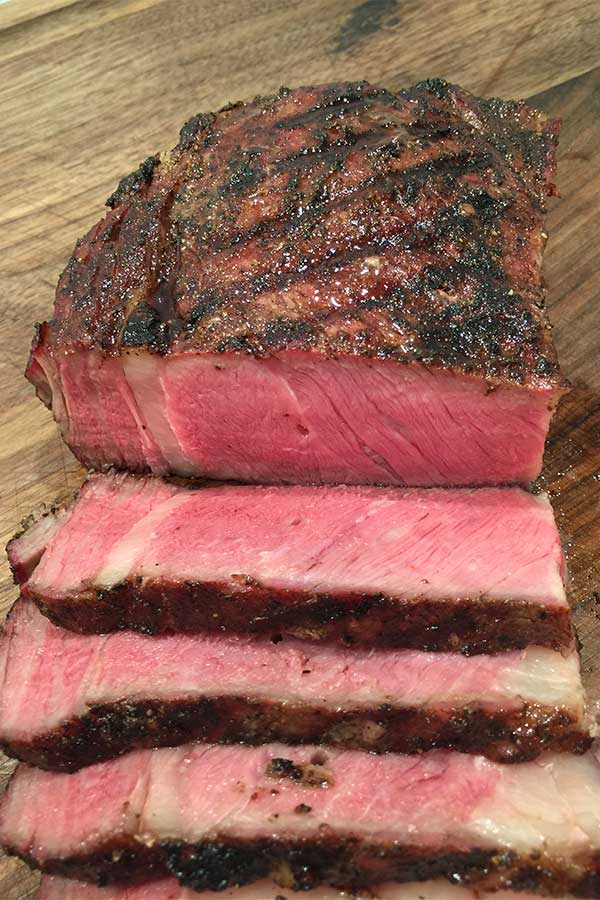
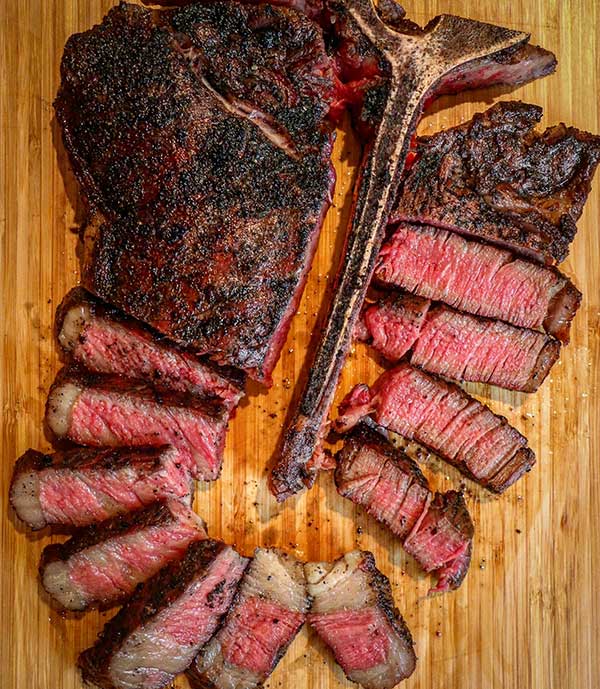
The reverse-sear method brings with it several benefits. First, as we discussed earlier, this method prevents the overcooking of the outside of the meat that often occurs with other cooking techniques. It’s a foolproof way to achieve perfect doneness from one edge of the meat to the other without overcooking the outside. Notice the edge-to-edge uniformity and the doneness in the picture below:
Second, you get to eat a piping hot steak. Using other methods, meat often requires a rest period after cooking to allow muscle fibers to relax. Without this rest, when you cut into a steak or pork chop, the juices run everywhere. Why? Because the muscle fibers are so tight from the long heat exposure, they are literally squeezing the juices out. So, resting is required for a juicy piece of meat, but the downside is that you’re eating meat that’s only lukewarm.
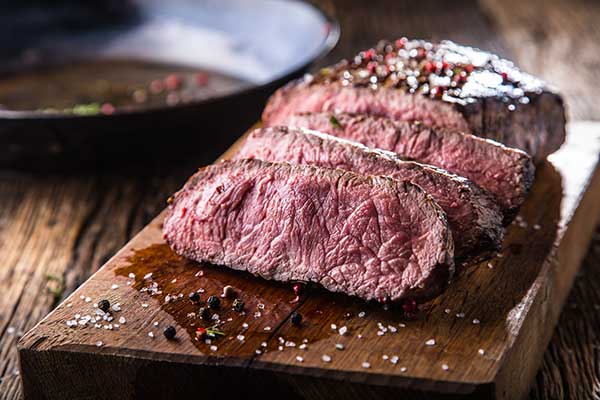
By quickly searing at the end, we can cut into the steak like this porterhouse below, right when it comes off the heat. The rest of the cooking happens prior to the sear. So, you’re eating a piping hot steak that’s also juicy, and that’s always a good thing.
Should the Reverse-Sear Method Be Used for All Meats?
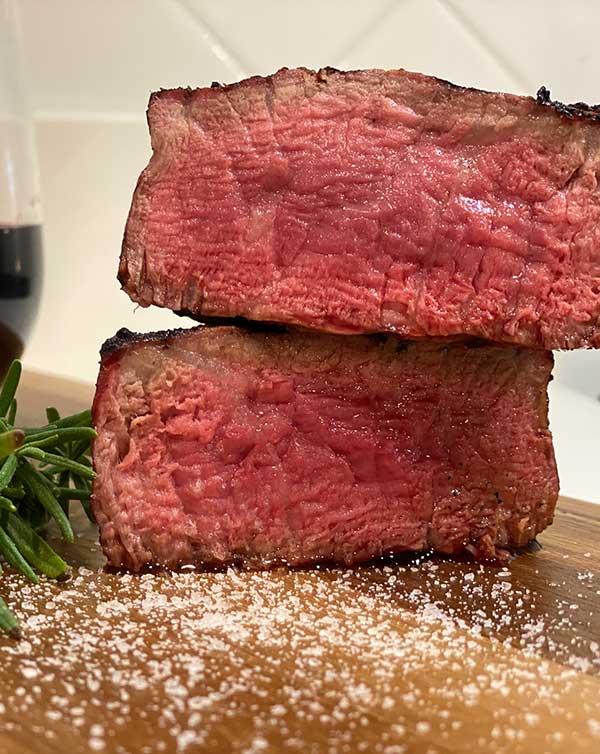
No, I don’t suggest using the reverse-sear method of cooking thinner cuts of meat. In general, this method is best for cuts of meat that are about 1.5″ or more. Prime rib for example, is a great candidate for the reverse-sear method, but that’s an extremely obvious example. Other cuts like the king cut line up are perfect for reverse searing. Of course, the most popular cut to benefit from this method is the filet mignon. Along with the top sirloin, these are both notoriously difficult to cook evenly through, but as you can see below, the reverse-sear method creates the perfect doneness.
This method is also great for proteins other than beef. The king cut pork chop, for example, and rack of lamb can be done this way as well.
What’s better, this method can be done on a grill, or inside using the oven and a cast iron pan.
Tips for Best Results Using the Reverse-Sear Method
Keep your temps low for the first portion of the cooking. I like to stay in the 225°F range and certainly no higher than 250°F. The idea is to bring your meat up to temp slowly and evenly. Much hotter than the 225°–250° range, your meat will cook too fast and the energy created will increase carry-over cooking.
DO NOT TRUST the thermometer on your grill’s lid. These thermometers are notoriously inaccurate, even on the most expensive grills. Invest in a reliable multi-channel leave-in thermometer. This allows you to monitor both grill temperature and meat temperature. Such thermometers aren’t expensive and are worth their weight in gold.
Understand the concept of two-zone cooking. It’s outlined for you here.
Place grill temperature probe near the meat, not near the heat source. You need to know the temperature of the cooking area where the meat is placed.
Place meat on grill with care. When using this method for a T-bone or porterhouse (for the difference between the two read here), always position the filet portion furthest from the heat source. It’s leaner than the strip portion of the steak and cooks faster.
Pay attention to the bones. When cooking any bone-in protein, always position the meat with the bones toward the heat source.
Rest the meat a little early. Remove protein at about 5° shy of desired final temperature and allow meat to rest while you prepare the direct heating sear zone. Let meat rest till it has peaked in temperature as indicated on your leave-in thermometer. For example, if a piece of meat is removed from the grill at 125° internal temperature, it will continue to cook for 5 minutes or so to closer to 130°. Once peak temperature is reached, it’s then ready to be seared.
Make sure the meat is dry on the outside. Blot any juices off the meat before searing. Moisture is the enemy to a good sear because it creates steam.
Turn often! Don’t listen to the old folklore about only flipping once. As a general rule, flip protein every 20 seconds when over intense heat, for a total of 5 minutes. Depending the level of heat you’re using this should create the perfect sear.
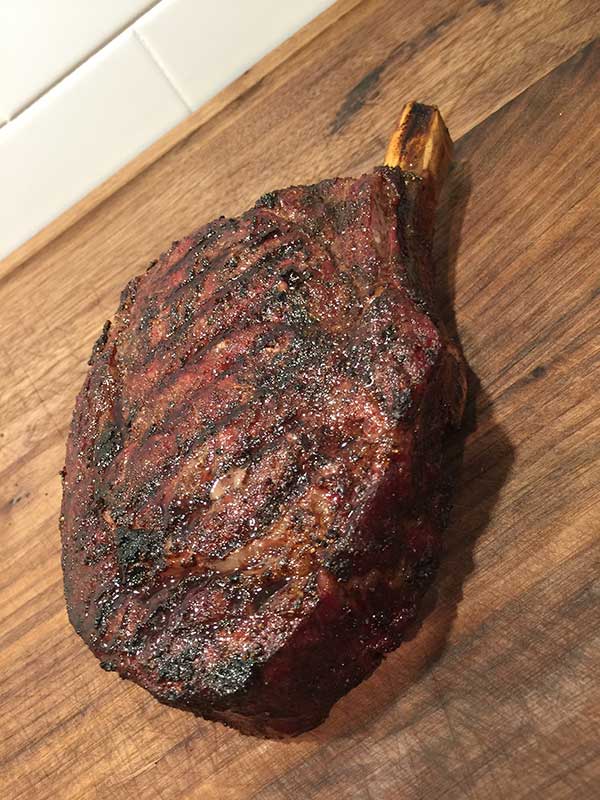
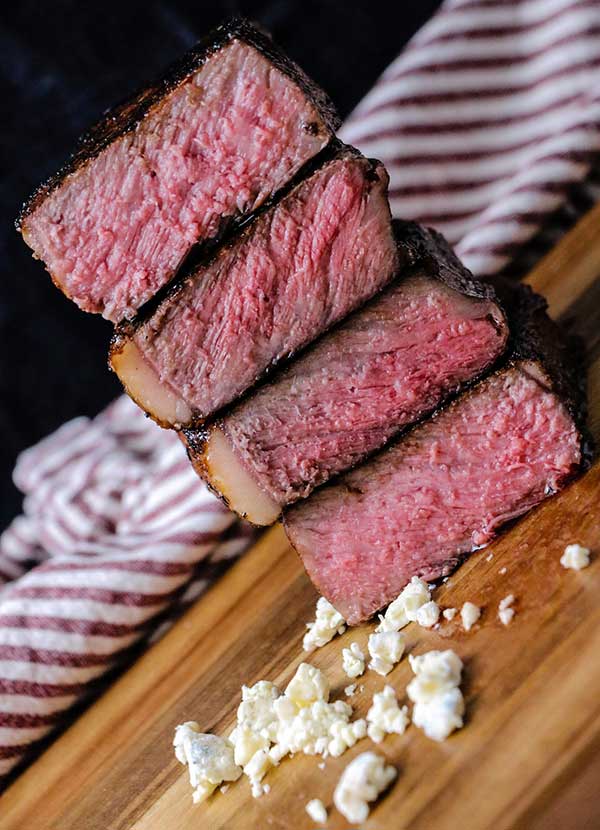
Embrace the overall char, that’s the flavor! Trust your leave-in thermometer. Look at this ribeye below. It has overall char that some might think appears burnt until it’s sliced.